

Resellers: you can white-label the Simplified Platform and offer it to your clients under your own brand. Choose which product each client gets (full Platform or the simplified receptionist view) from Platform Configuration.
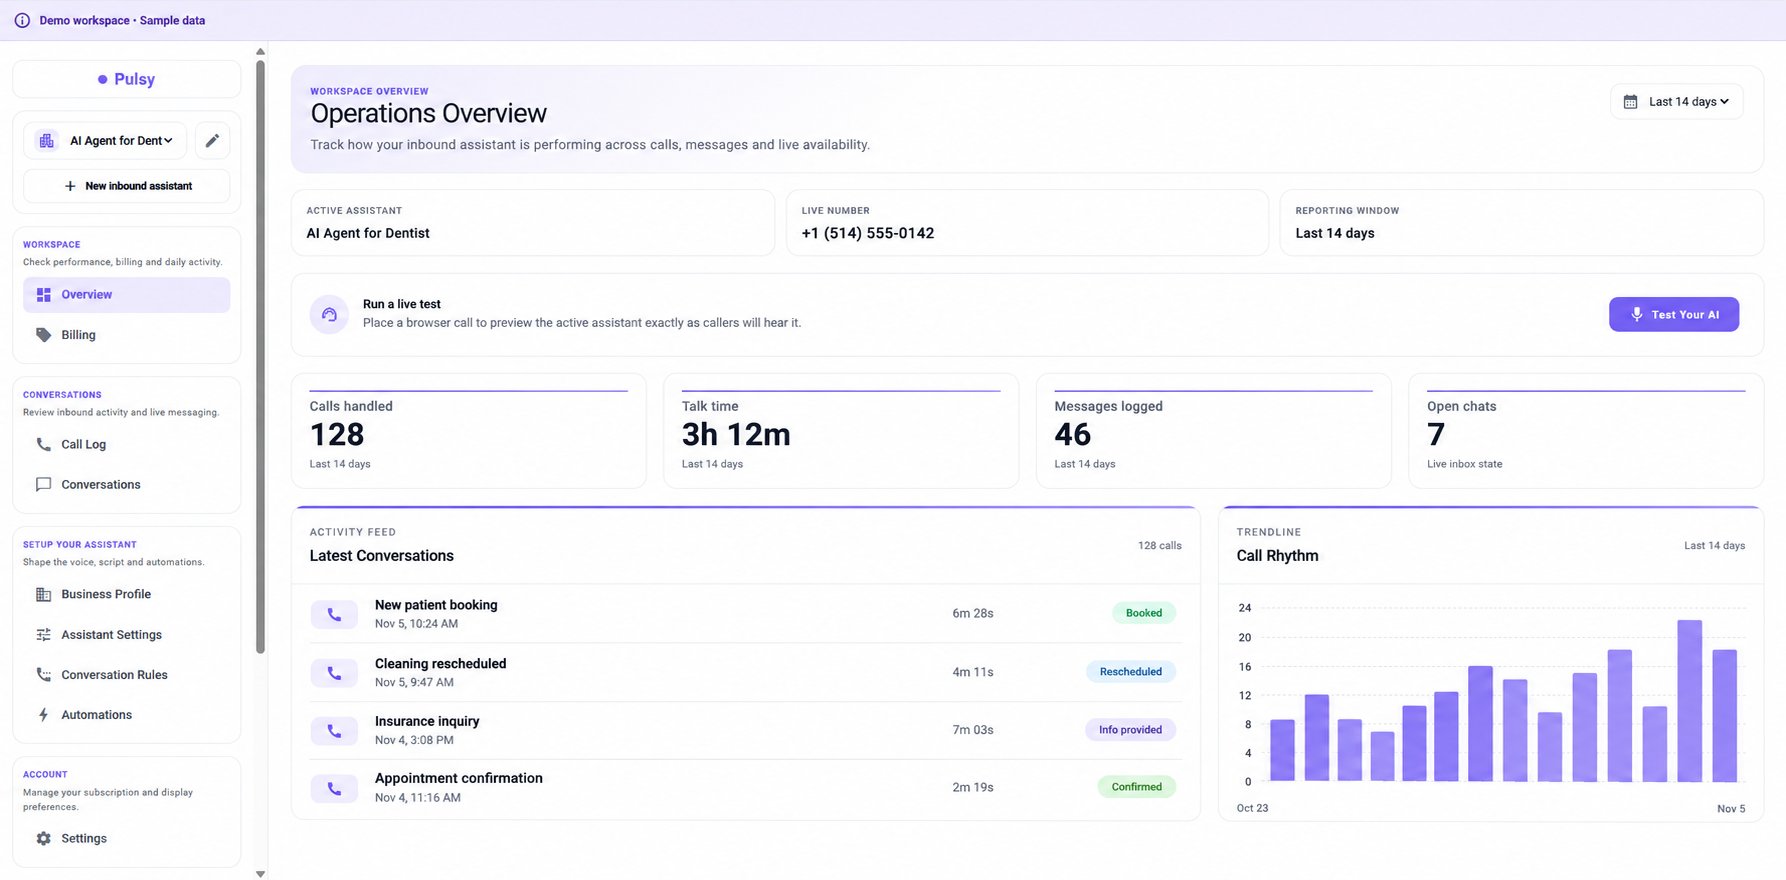
The Simplified Platform: everything your receptionist needs, organized in one sidebar.
How the interface is organized
Everything lives in one sidebar, grouped into four sections:
At the top of the sidebar you can switch between your assistants, rename the current one, or create a New inbound assistant. At the bottom, Test Your AI lets you try the receptionist yourself, and the Interface / Simplified interface switch takes you between the full Platform and the Simplified Platform.
Until a phone number is connected, a banner at the top reads “To get your agent live, attach a phone number.” Click Attach a number to connect one. See Phone Numbers.
Set up your assistant
These four pages are where the receptionist is built. Work through them top to bottom the first time.Business Profile
The Business Profile is the receptionist’s knowledge of your business: the context, service areas and pricing it can speak about with confidence. Start with Google. In the Google Business Profile card, paste your Google Business or Google Maps link (or type your exact public business name) and click Auto-fill from Google. PulsyAI pulls your business information, including your website, and fills in the profile automatically in under a minute. Everything it pulls goes into the assistant’s knowledge, so it can answer callers right away. Every field stays editable, so you can review what was filled in and complete or correct anything by hand. The profile is made of simple sections:- Brand Snapshot: business name, tagline, website, business category, service delivery modes, description, year founded and years in business.
- Reach & Service Area: street address, city, region/county, postcode, service areas, coverage distance (km), business phone and business email.
- Availability Window: your opening hours for each day of the week (open or closed, start and end time), or switch on Open 24/7. Add exceptions in Additional Hours Information. Outside business hours, the AI tells callers when you’re available.
- Services & Pricing: one row per service with its price, pricing type and a short description of what’s included, plus Additional Pricing Notes. Use Update from PDF to fill services from a document.
- Credentials & Certifications: qualifications the assistant can mention.
- Accepted Payment Methods: for example cash, card, PayPal, bank transfer, Apple Pay or Google Pay.
- Trust & Coverage: your service guarantee and insurance coverage.
- Social Presence: links to your social media profiles.
- Common Questions: your FAQ, added one by one or with Update from PDF.

Business Profile: auto-fill from Google, then review simple sections like Brand Snapshot, Availability Window and Services & Pricing.
Assistant Settings
Assistant Settings defines how your assistant sounds, what context it follows and when it should transfer a call to a person.- Voice Identity: the Voice Library shows your current voice, with female and male voices labeled by accent and language (for example UK English, Quebec French, Parisian French, American English). Press play to preview a voice, then click Select, or use Change voice and Show all voices to browse more. Your selection updates the same voice settings used in the full Platform.
- Agent context: give the AI context on its role and your company’s expectations, in plain words.
- Transfer: switch on Enable call transfer when you want the assistant to offer a live transfer to a person during the call. Enter the Recipient name (who should receive the transfer) and the Transfer phone number. If no recipient name is set, the assistant uses a generic transfer label.

Assistant Settings: pick a voice, give the agent context, and set up call transfer.
Conversation Rules
Conversation Rules decides how the assistant greets callers, what it should collect, and how precise it should be when qualifying a lead. Everything is a toggle or a short answer, no scripting.- Greeting Message: what the assistant says when it picks up, for example “Hey, this is Luna, the virtual assistant of [your business], how can I help you?” Switch on Personalise with customer’s name when known? so the AI naturally uses the caller’s name if it already has it.
- Information Capture: choose what the assistant should collect by switching on each item, then set whether it’s required:
- Customer name
- Email address
- Phone number
- Complete home address collection
- Project details: switch it on and add the specific questions you want your AI to ask, for example “What type of service are you interested in?”, “Do you have a budget?” or “Any preferred stylist?”
- Availability window: switch it on so the assistant asks when the caller is available, and choose how precise times need to be: Get exact times (for example “Tuesday at 2pm”) or General time or day (for example “Monday morning” or “anytime on Wednesday”).

Conversation Rules: greeting, the information to collect, project questions and availability.
Automations
Automations manages the tools, booking logic and follow-up messages your assistant uses during and after each conversation.- Connected automations: the services your assistant can trigger or read from during the conversation: Cal.com, Zapier, GoHighLevel and Notifications. Each card shows whether it’s connected; click Connect to set one up, or Edit, Remove and Add another on a connected one.
- Booking workflow (during the call):
- Live calendar access: choose the calendar your assistant can use. Once a calendar is configured here, your AI can check availability during calls.
- Enable appointment booking during calls: once a live calendar is selected, switch this on to let the assistant book appointments directly.
- After-call Messages (follow-up): switch on Enable automatic after-call SMS to send a follow-up text when the conversation calls for it. Under SMS choices, add each follow-up as a condition plus the message to send, then click Save SMS Follow Up.
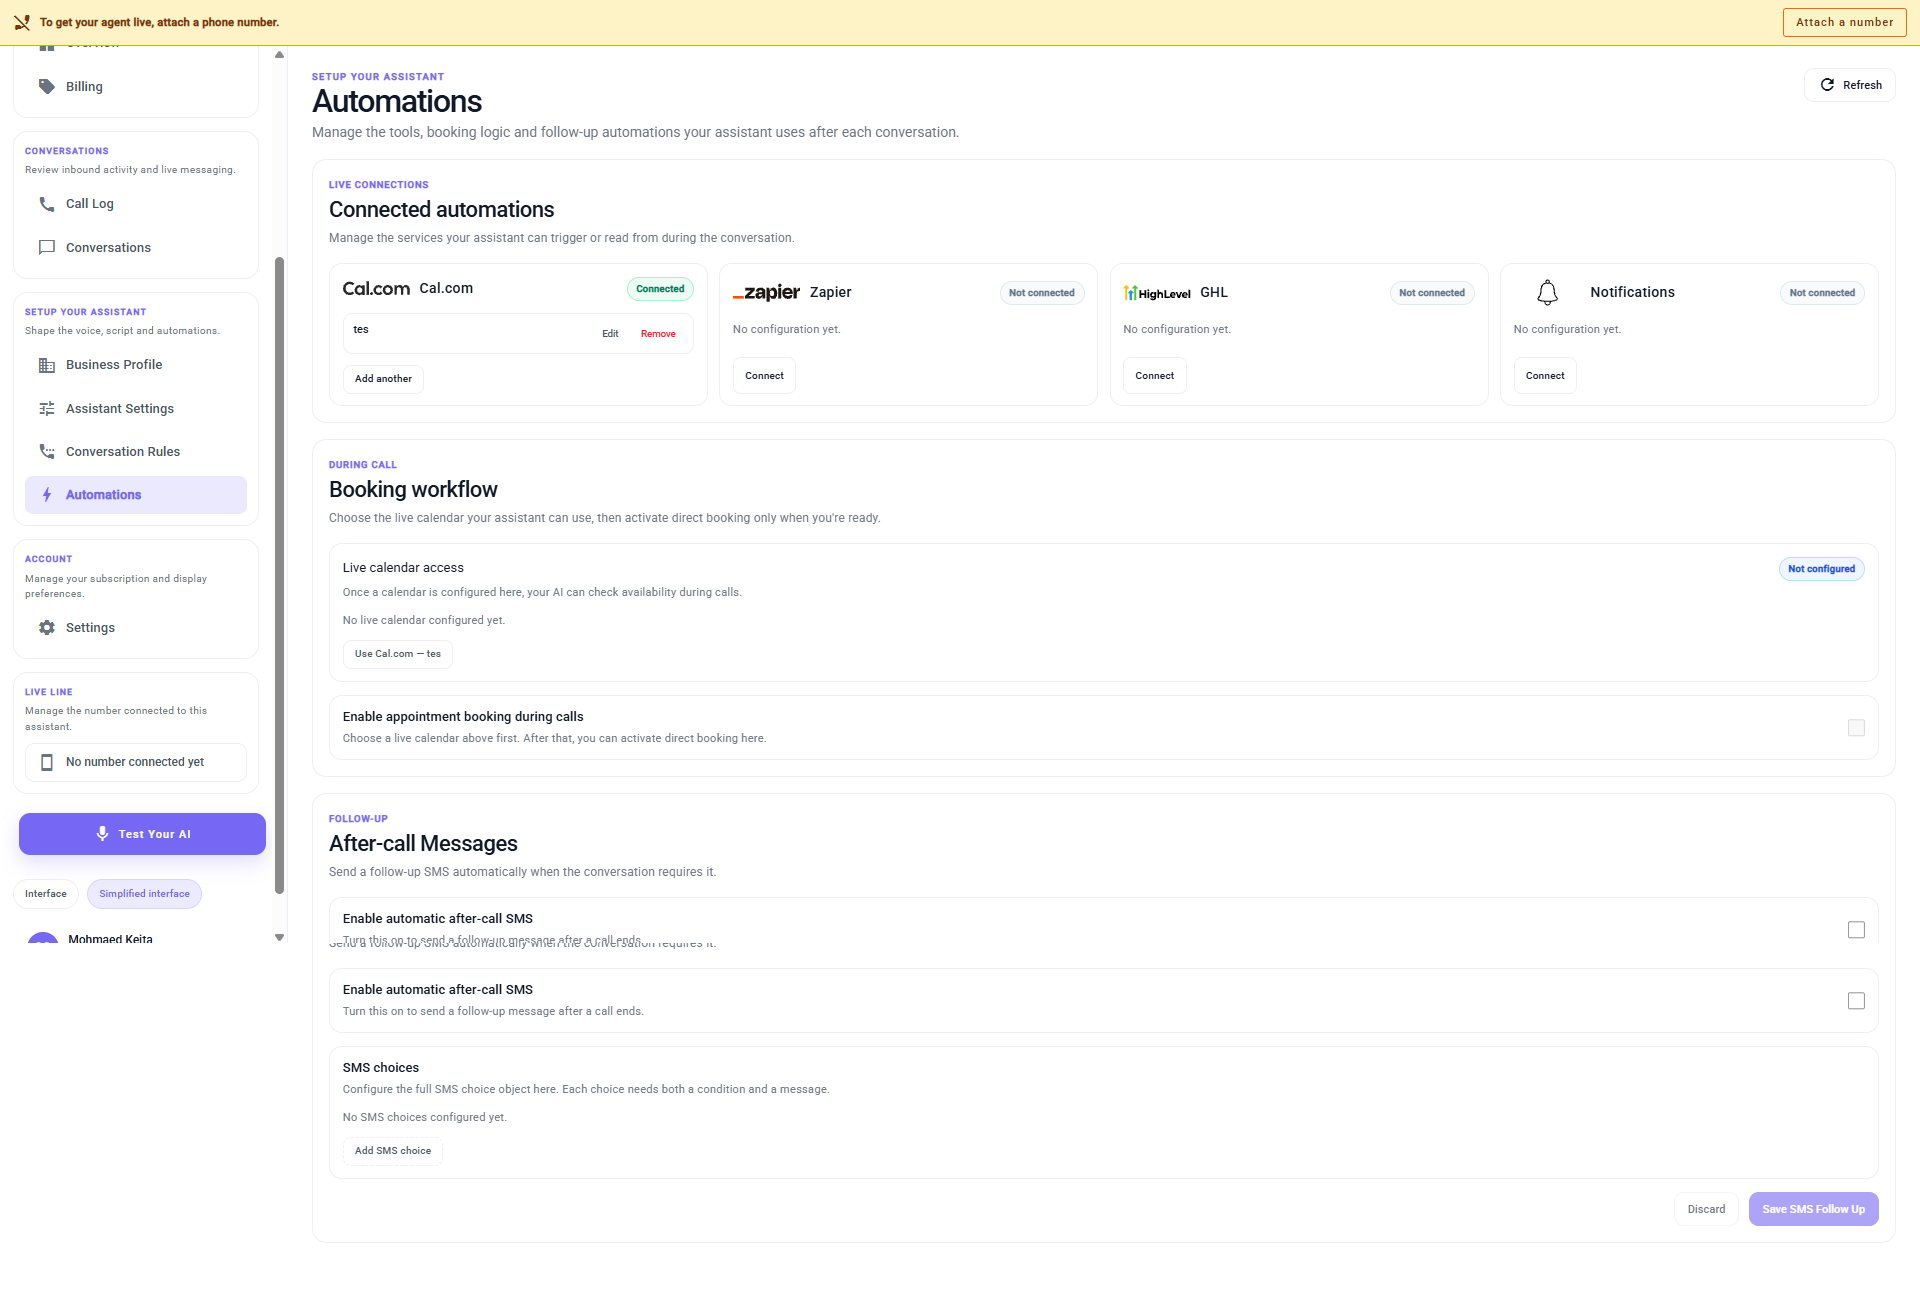
Automations: connect Cal.com, Zapier, GoHighLevel or Notifications, turn on live booking, and set up after-call SMS.
Conversations
Call Log
The Call Log lists every inbound phone interaction handled by your assistant, with the time, the caller’s phone number and the call duration. Search by number, summary or transcript, filter by date range (for example the last 7 days), and click any call to open its full details.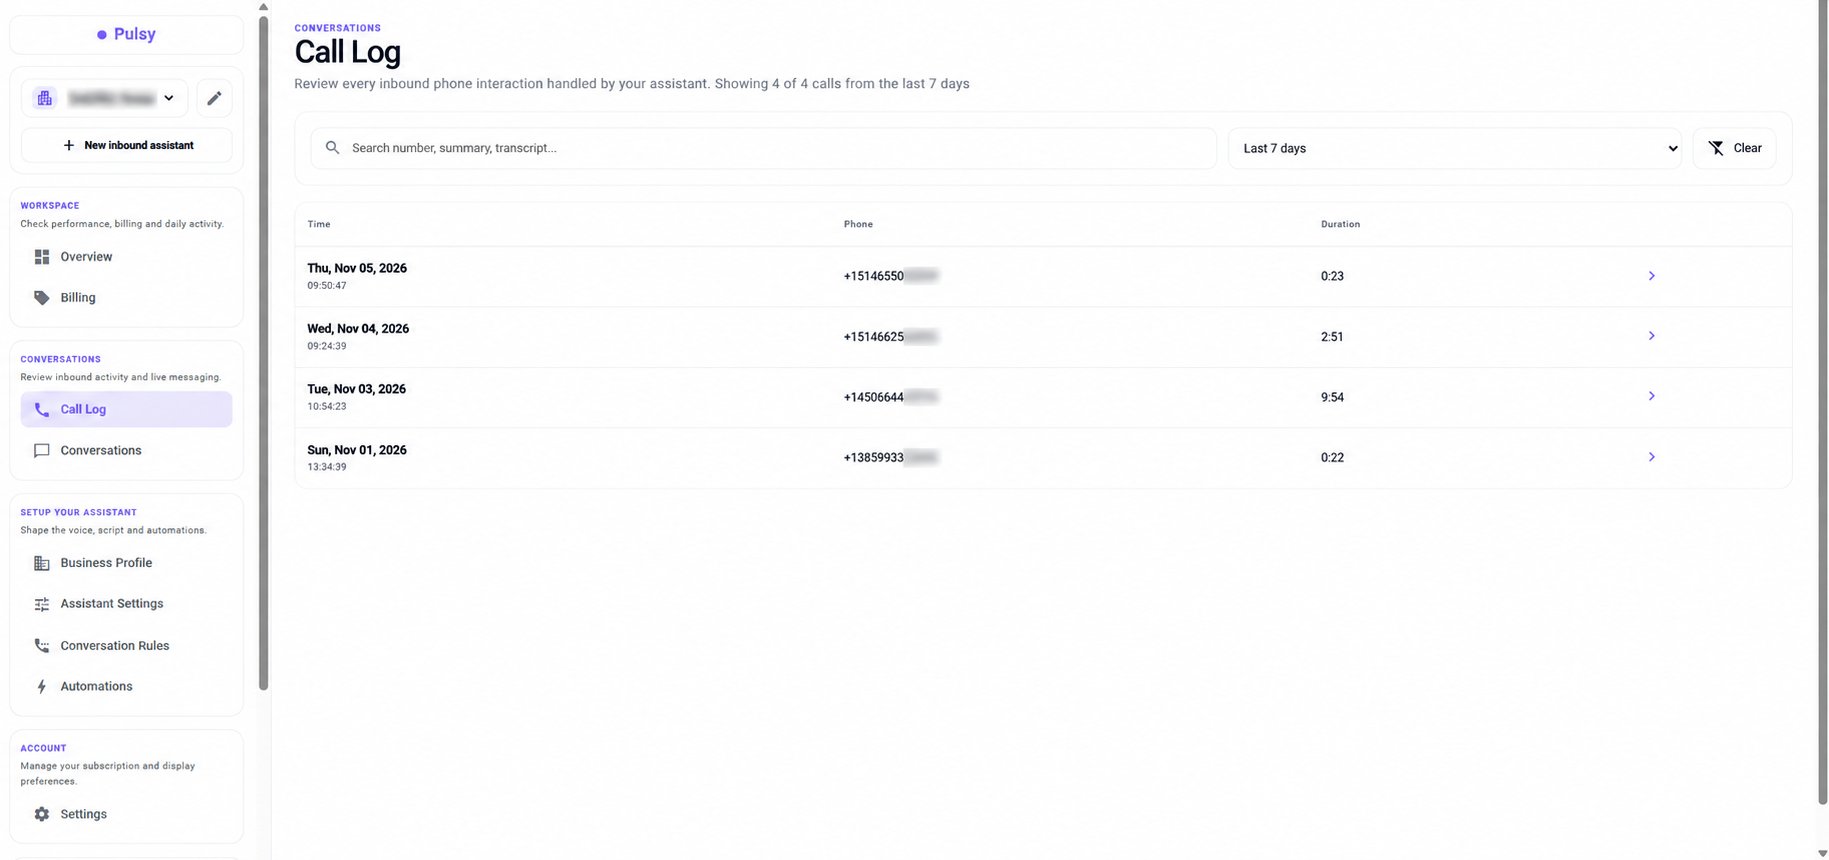
Call Log: every inbound call, searchable by number, summary or transcript.
Conversations
Conversations is where you review and respond to the SMS conversations tied to your active assistant. Pick a conversation from the list to read it, type a message and click Send to reply yourself. Use the Enabled switch to turn the AI on or off for a conversation, Empty Conversation to clear it, and Fetch More to load older conversations.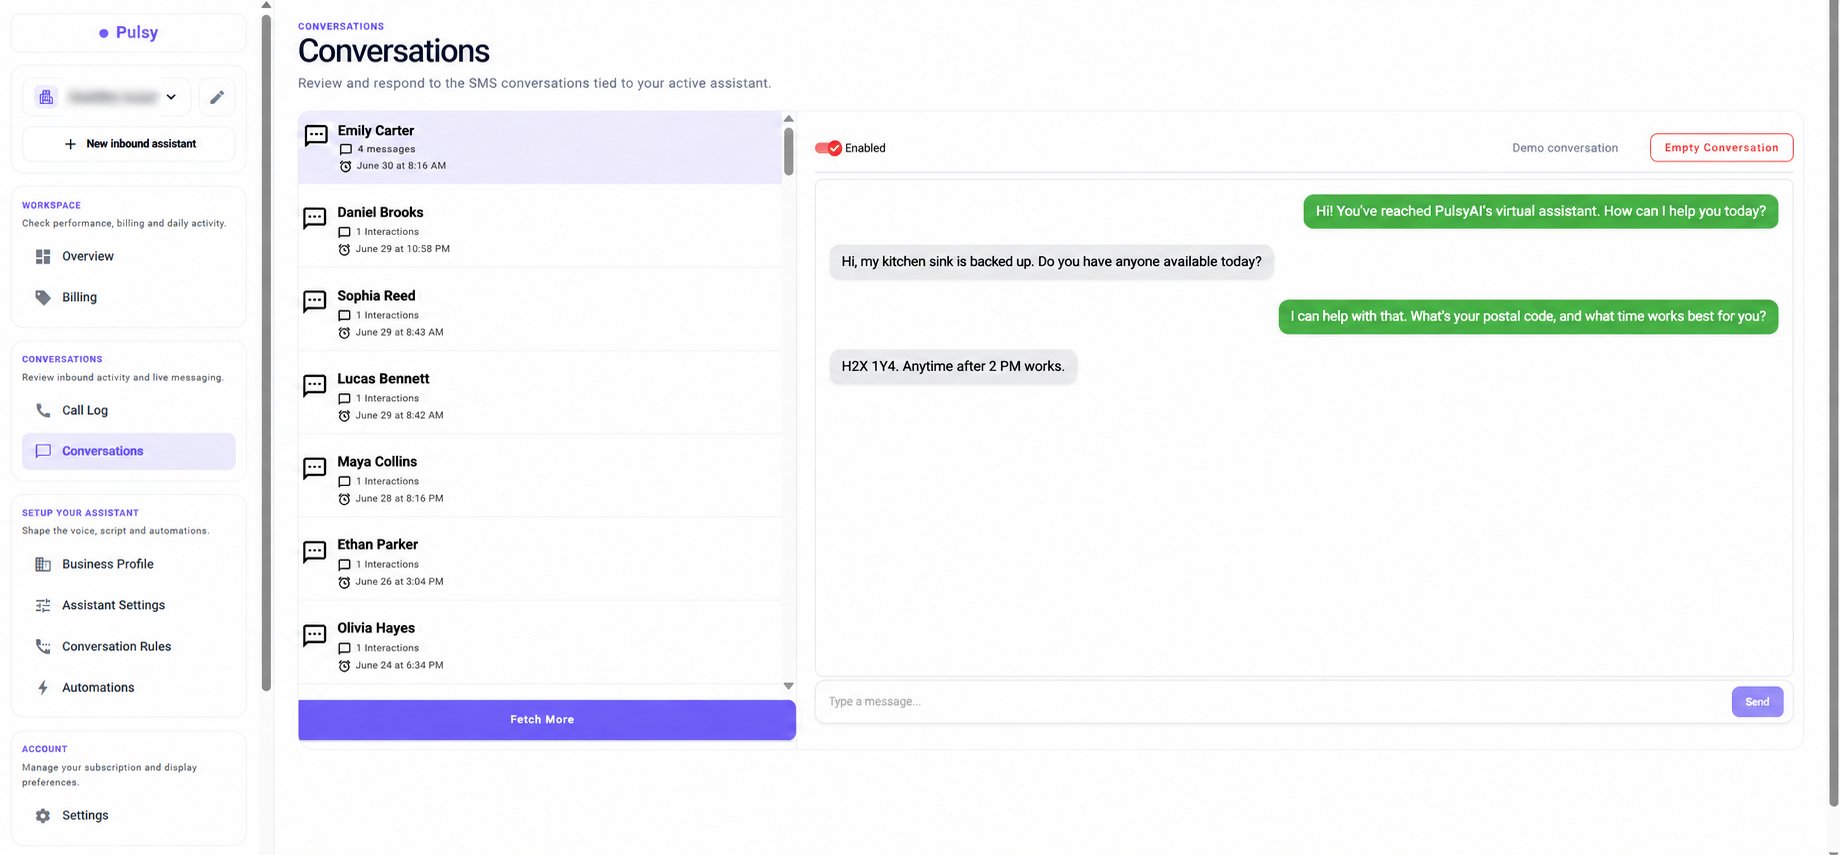
Conversations: read and reply to SMS threads with your callers.
Workspace
Overview
The Operations Overview tracks how your inbound assistant is performing across calls, messages and live availability. Pick the period you want to look at with the date range selector (for example the last 14 days).- At a glance: the active assistant, its live number, and the reporting window you selected.
- Run a live test: click Test Your AI to place a browser call and hear the active assistant exactly as your callers will.
- Key numbers: Calls handled, Talk time and Messages logged over the period, plus Open chats (the live state of your inbox).
- Latest Conversations: an activity feed of recent calls, each with its duration and an outcome tag such as Booked, Rescheduled, Info provided or Confirmed.
- Call Rhythm: a chart of your call volume day by day over the period.
Billing
Billing shows the pricing of the service and your subscription. Resellers set their own prices, and those are the prices their clients see here. See Plans.Next steps
Phone Numbers
Attach a number to put your receptionist live.
Platform Configuration
Resellers: choose which product each client gets.