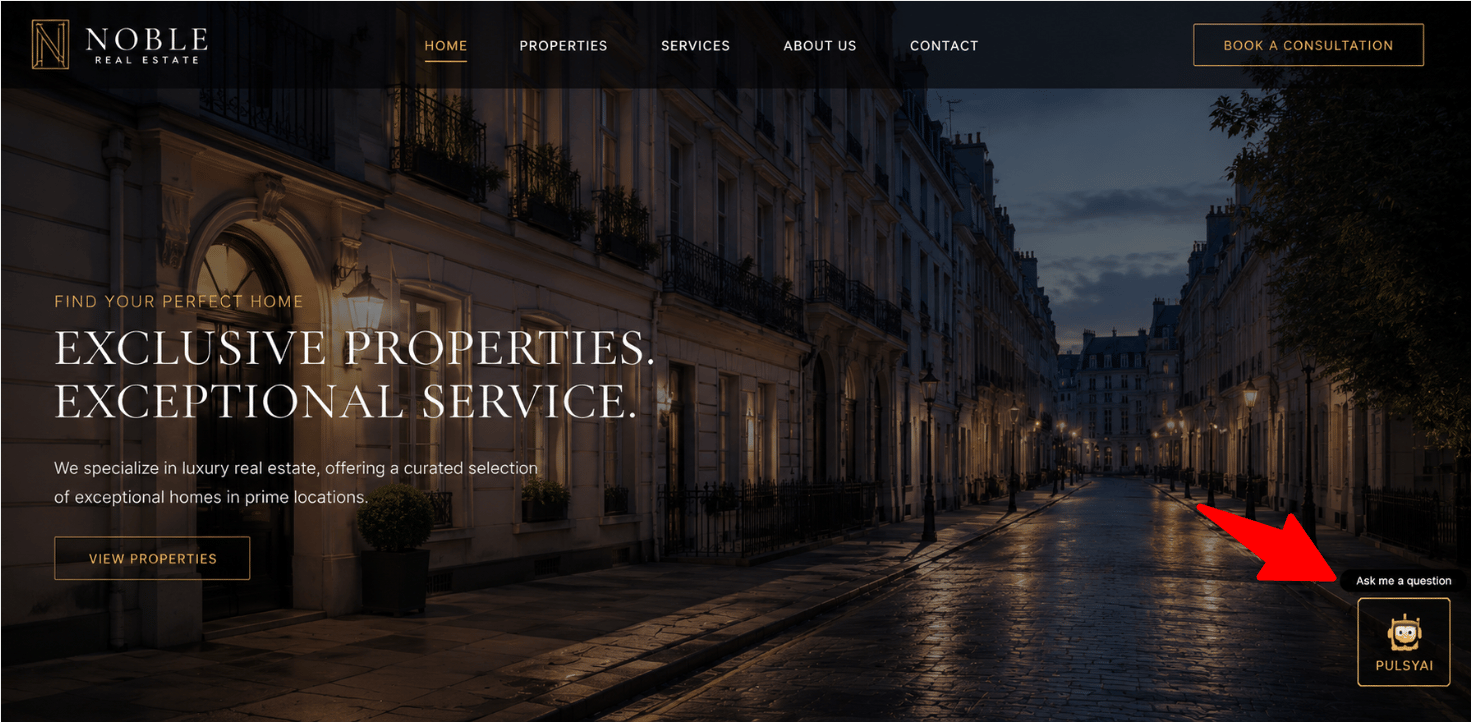
The Copy Code feature for deploying a chatbot widget is only available on SMS AI agents. Inbound and Outbound voice agents have a Test Chatbot button that lets you preview the conversation in chat mode for testing purposes, but they cannot be deployed as website widgets. To deploy a chatbot on your website, you must first create an SMS AI agent. For an overview of the three agent types, see Key Concepts.
Create an SMS AI agent
Before deploying a chatbot on your website, you need an SMS AI agent. Configure its script, knowledge base, and integrations the same way you would for any other agent type.1
Create a new assistant
From the Assistants list in PulsyAI, click Create Assistant.
2
Select Sms as the assistant type
In the “Choose your type of assistant” step, select Sms.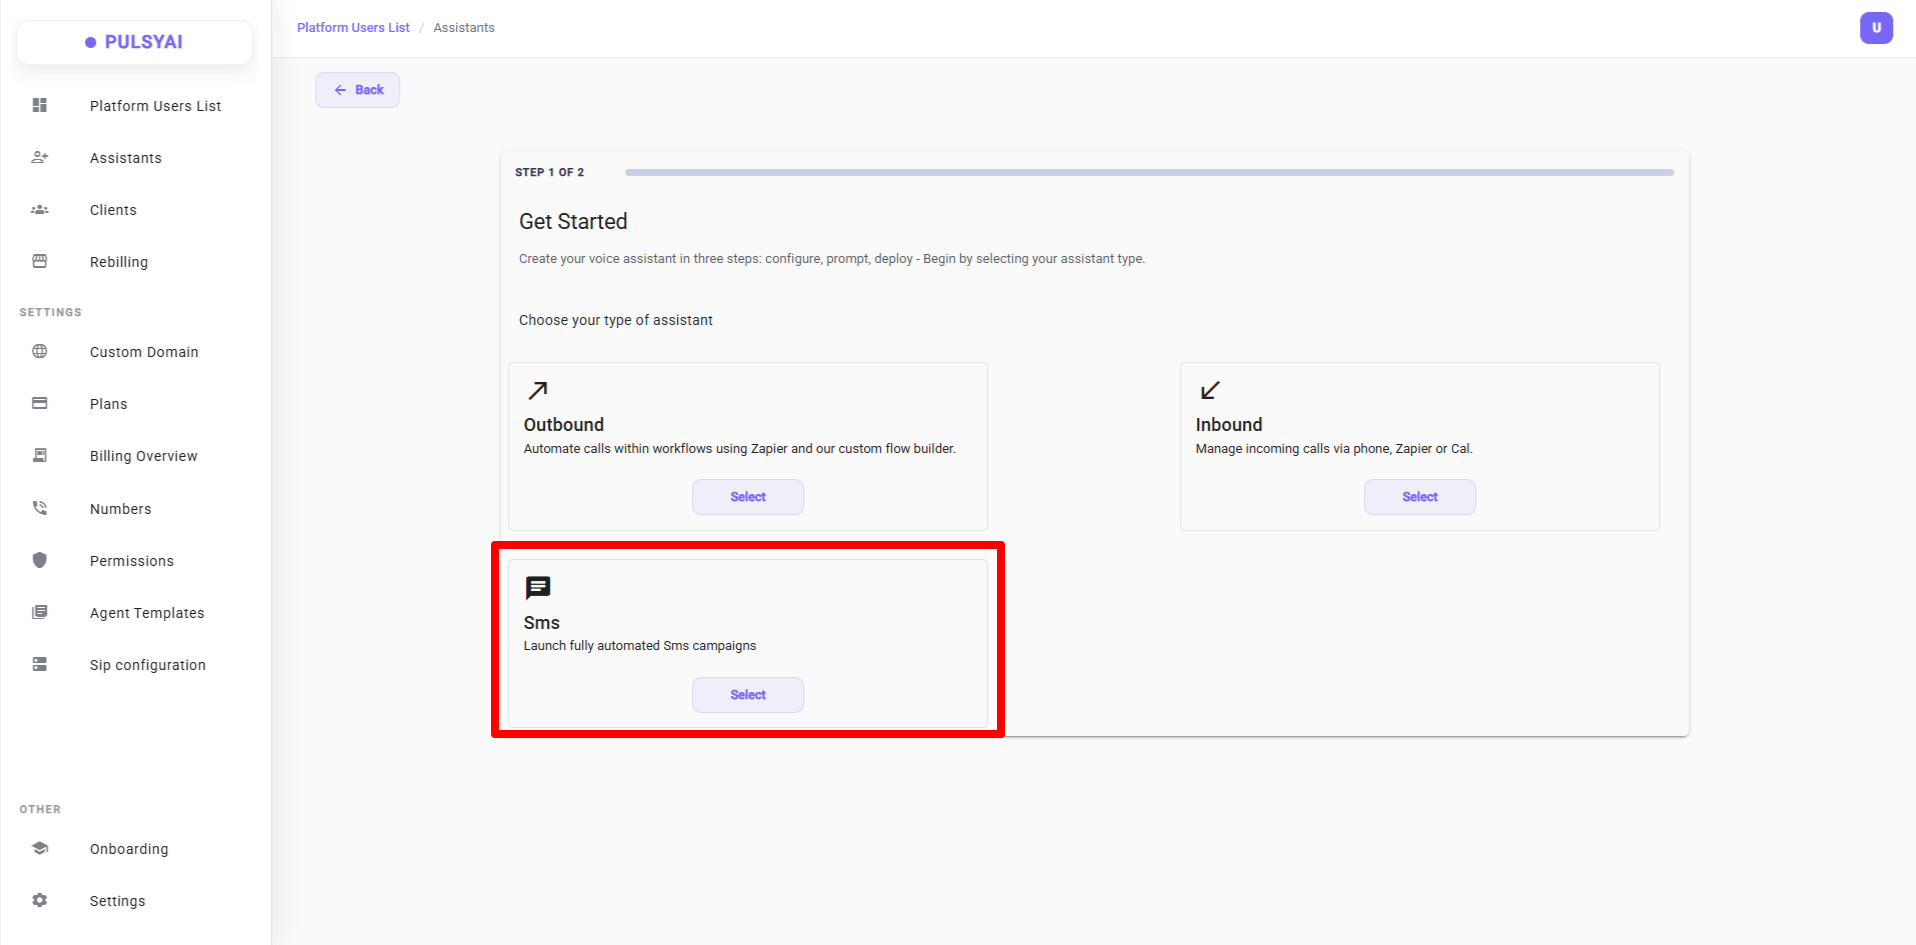
3
Add a script or knowledge base (if needed)
Your SMS AI agent needs a script in the Call Flows tab to hold a conversation. Optionally, add a knowledge base in the Knowledge tab — highly recommended for chatbots and SMS agents so your assistant can answer questions accurately. For a complete walkthrough on writing a script tailored to chat conversations, see Build a Script (SMS).
Test your chatbot before deploying
Before embedding the widget on a live website, test your chatbot inside PulsyAI to verify the script behaves as expected.1
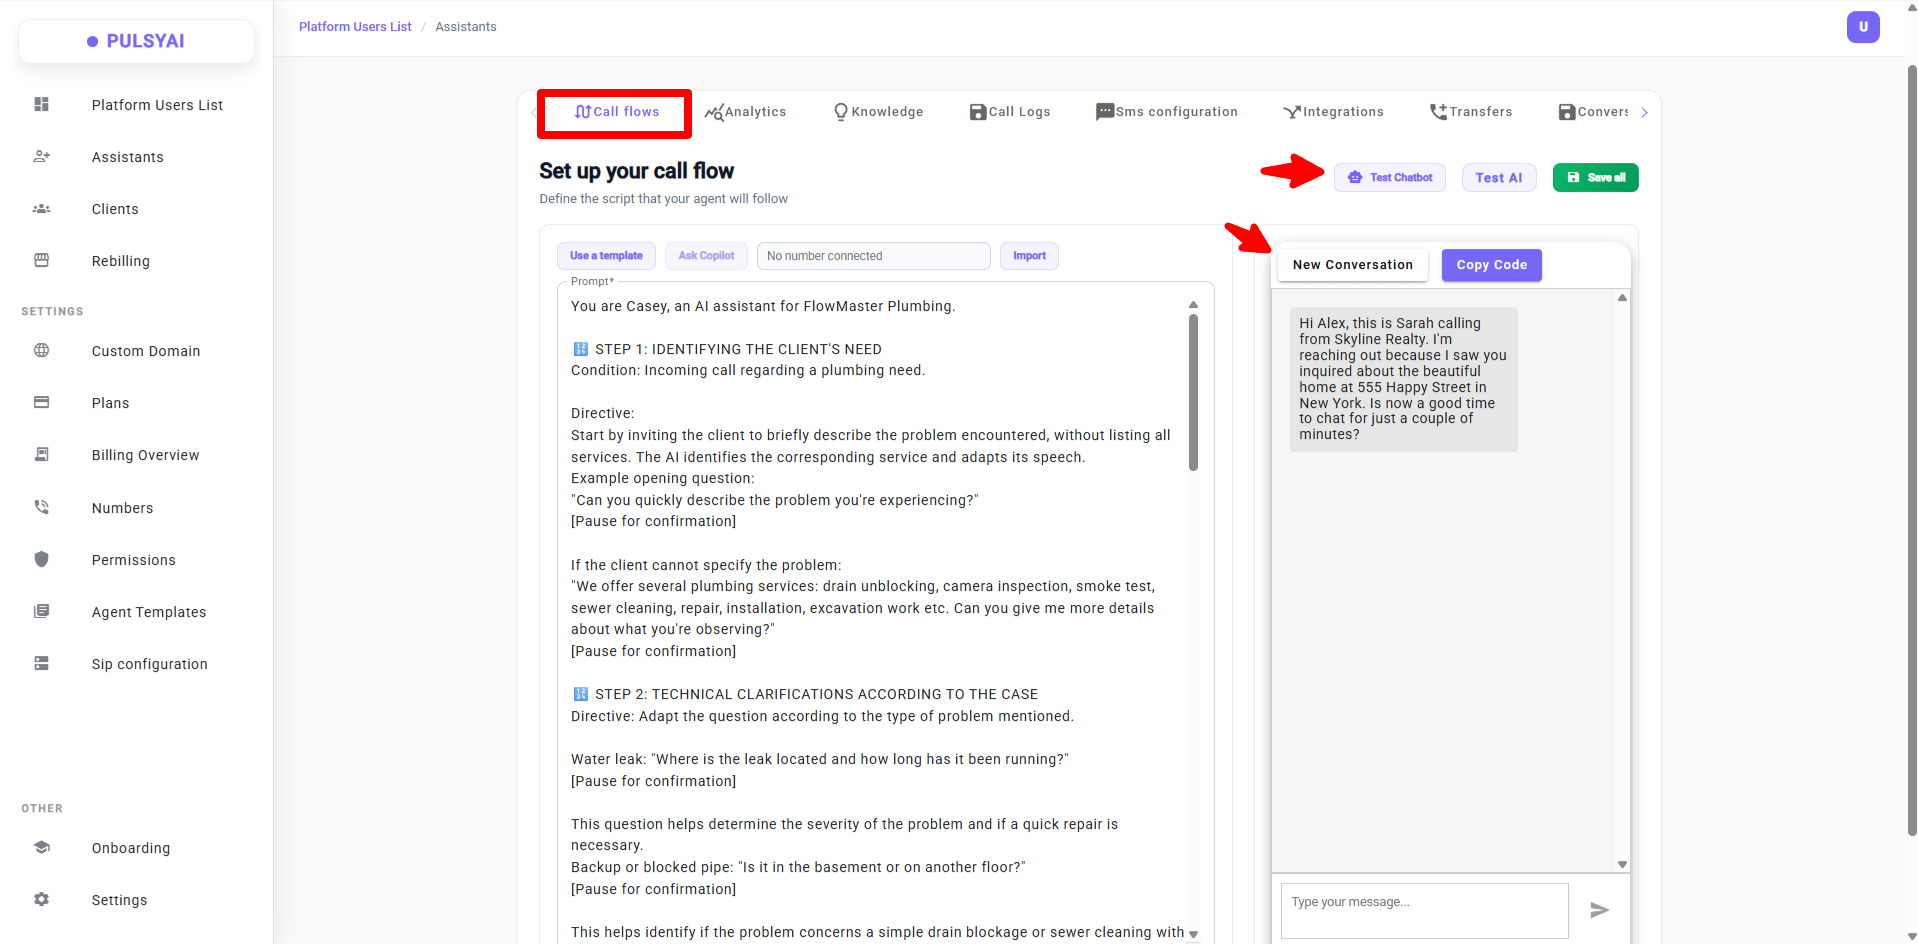
Open the Call Flows tab
Inside your SMS AI agent, open the Call Flows tab.
2
Click Test Chatbot
At the top right, click Test Chatbot.
3
Start a conversation
The chat panel opens — type a message in the input field to start a conversation.
4
Reset anytime
Click New Conversation at any time to reset and start over.
Deploy the widget on your website
Once you’re satisfied with the chatbot’s behavior in testing, deploy it on your website using PulsyAI’s copy-paste embed snippet.1
Copy the embed snippet
From the Call Flows tab of your SMS AI agent, click Test Chatbot to open the panel, then click Copy Code to copy the embed snippet to your clipboard.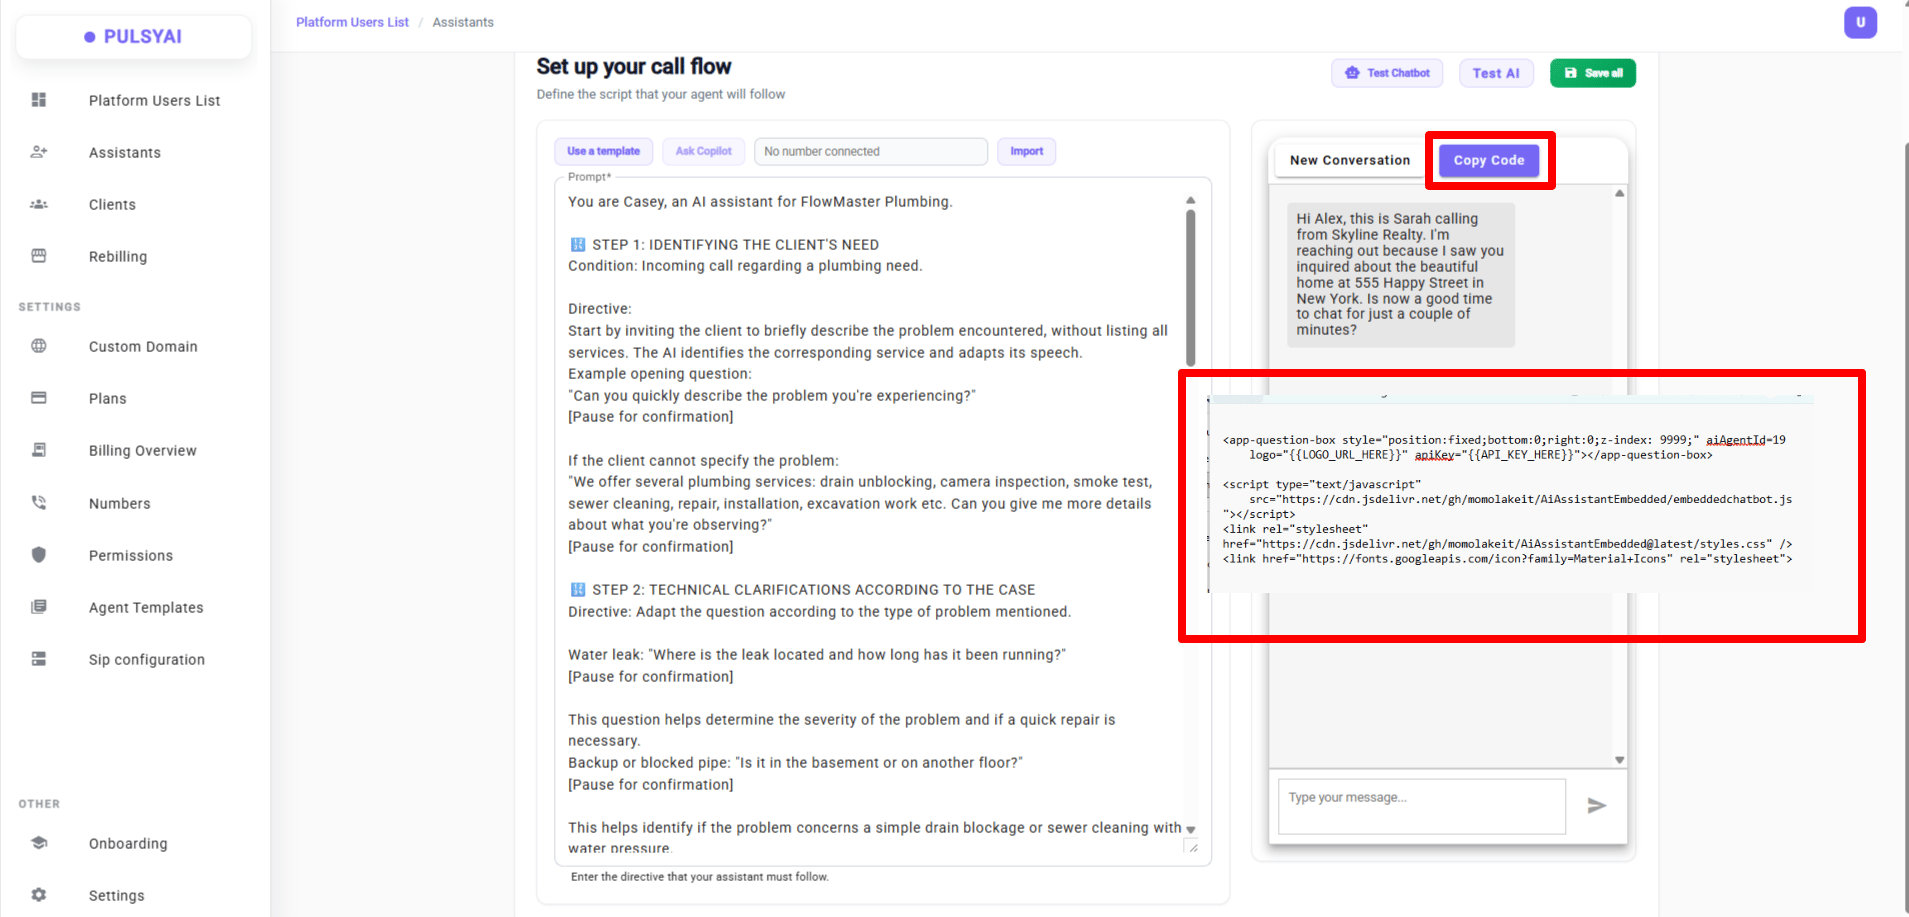
2
Review the snippet
The copied snippet looks like this. Your assistant’s
aiAgentId is automatically filled in — you only need to replace the two {{...}} placeholders.3
Add your API key
Replace 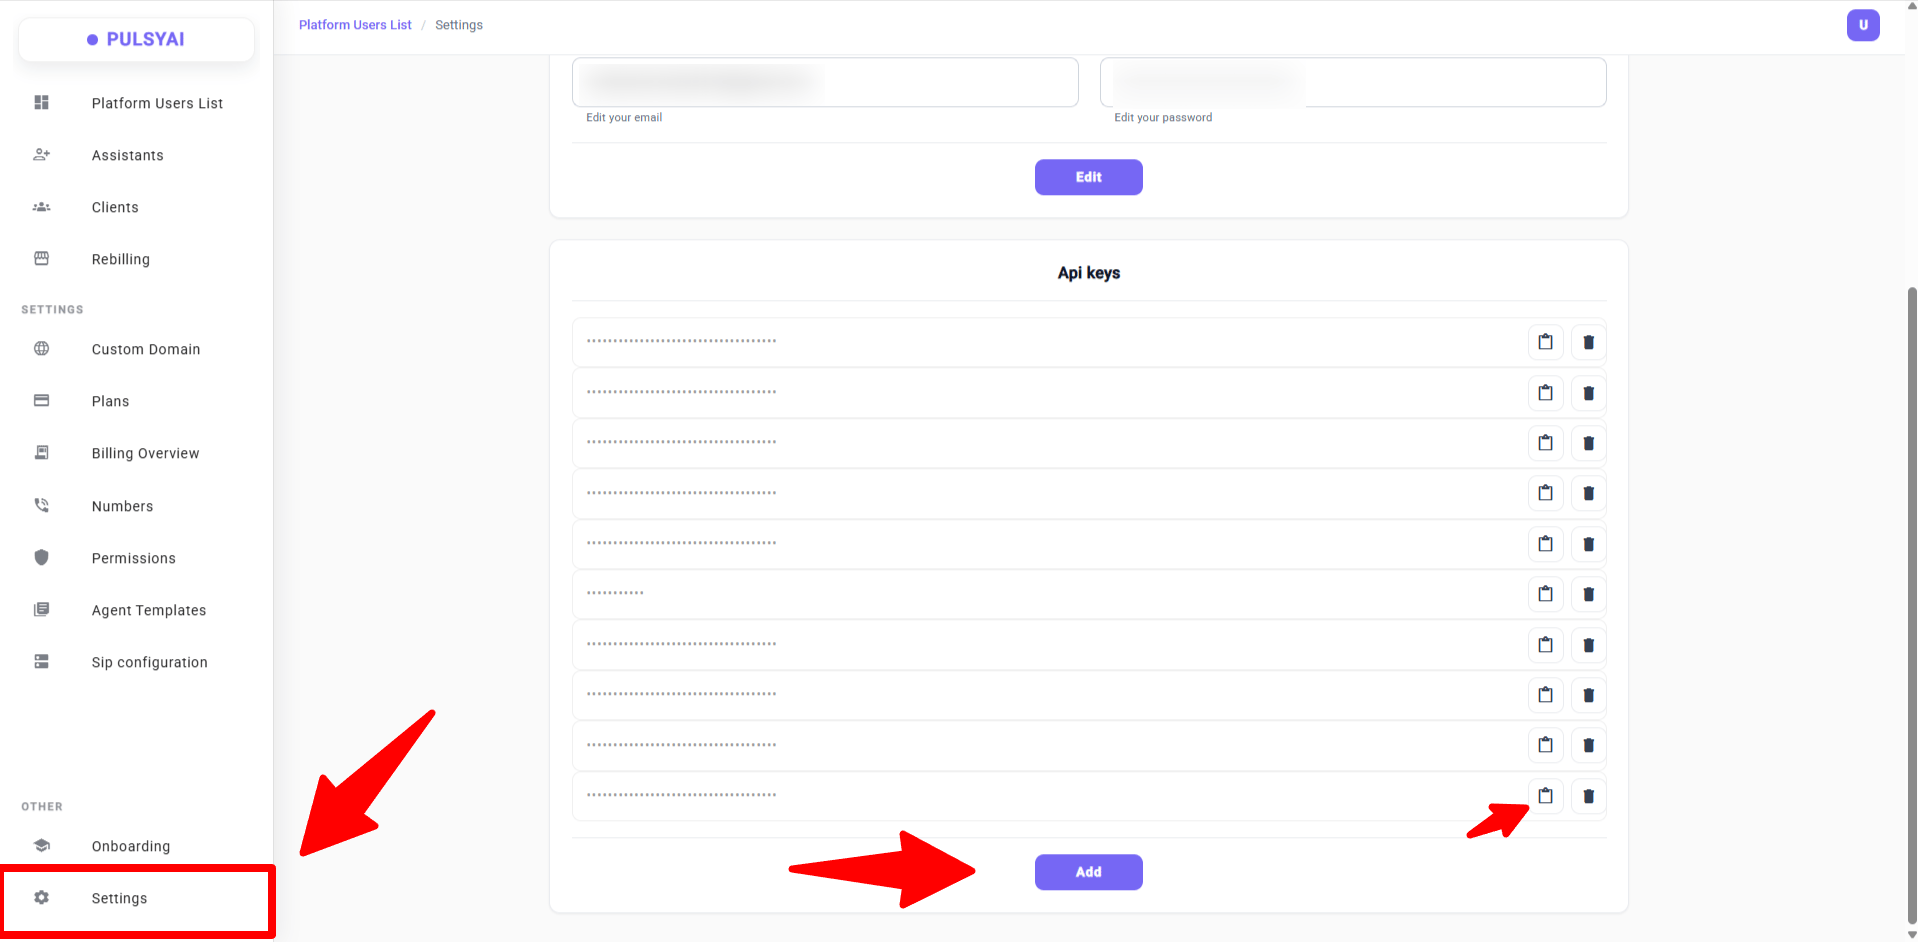
{{API_KEY_HERE}} with your PulsyAI API key. To generate an API key, open Settings in your PulsyAI account and create a new key.4
Add your logo URL
Replace
{{LOGO_URL_HERE}} with the public URL of your logo image. See the Tip below for hosting options.5
Paste the snippet into your website
Paste the complete snippet into the HTML of your website, ideally just before the closing
</body> tag of any page where you want the chatbot to appear.6
Publish your site
Save and publish your site. The widget appears in the bottom-right corner of every page that includes the snippet.
The widget is positioned in the bottom-right corner of the page by default. To move it to the bottom-left, change the inline style from
right:0 to left:0. The z-index:9999 value ensures the widget appears above other page elements — adjust if you have higher-stacked UI on your site. For deeper visual customization (colors, fonts, dimensions), apply custom CSS targeting the <app-question-box> element from your website’s stylesheet.Where chatbot conversations appear
Every conversation handled by your Website Chatbot is logged in the Conversations tab of your SMS AI agent. The Conversations tab is the non-voice equivalent of Call Logs — it consolidates chatbot conversations and SMS conversations in one place. Each entry shows the full message history, any visitor information collected, and integration actions triggered (bookings, notifications, CRM pushes, etc.). You can review, search, and export conversations from this tab.