

Where to find Custom Logo
Custom Logo is configured from the Settings page in the white-label admin. Click Settings at the bottom of the left sidebar — two branding buttons, Add Logo and Change Theme Color, sit at the top of the Settings page, just below your account header.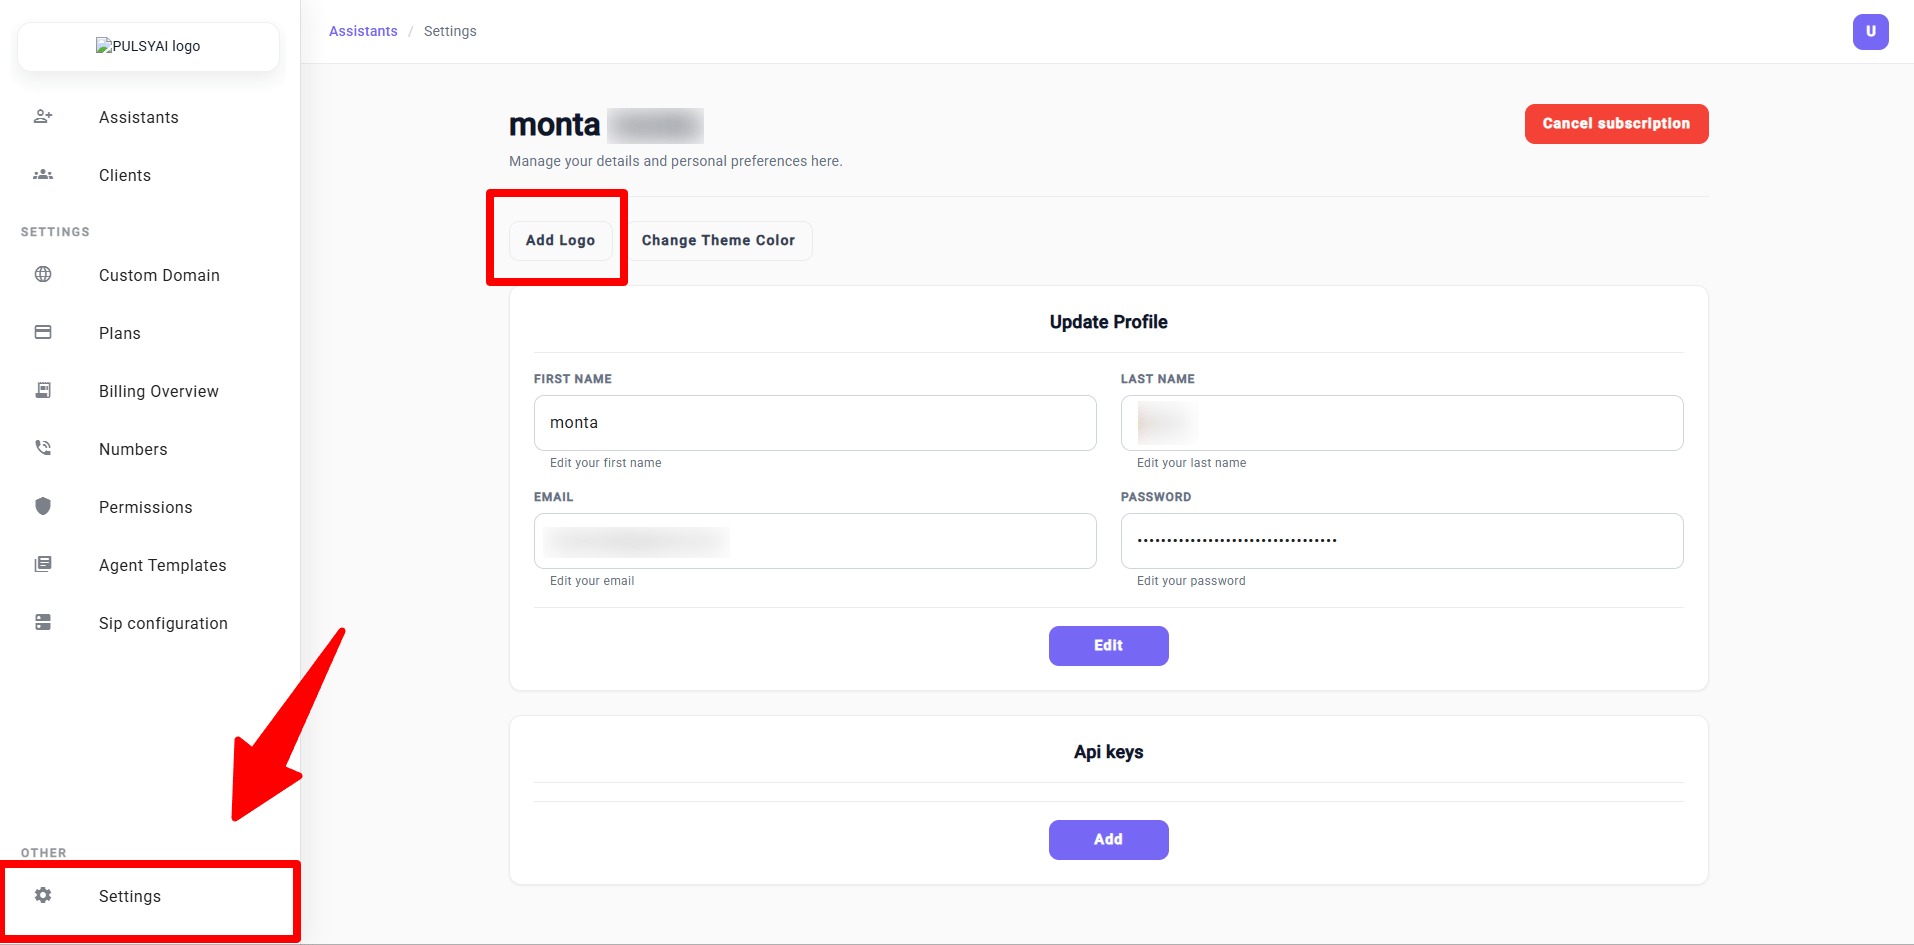
Logo specifications
Before uploading, prepare your logo file with these specifications:- Format: JPG (JPEG) — the only supported format.
- Recommended dimensions: 1320 × 349 pixels (horizontal orientation, sized to fit the sidebar).
Upload your logo
1
Open the Add Logo modal
From the Settings page, click the Add Logo button at the top. A modal opens with the upload interface and the recommended dimensions.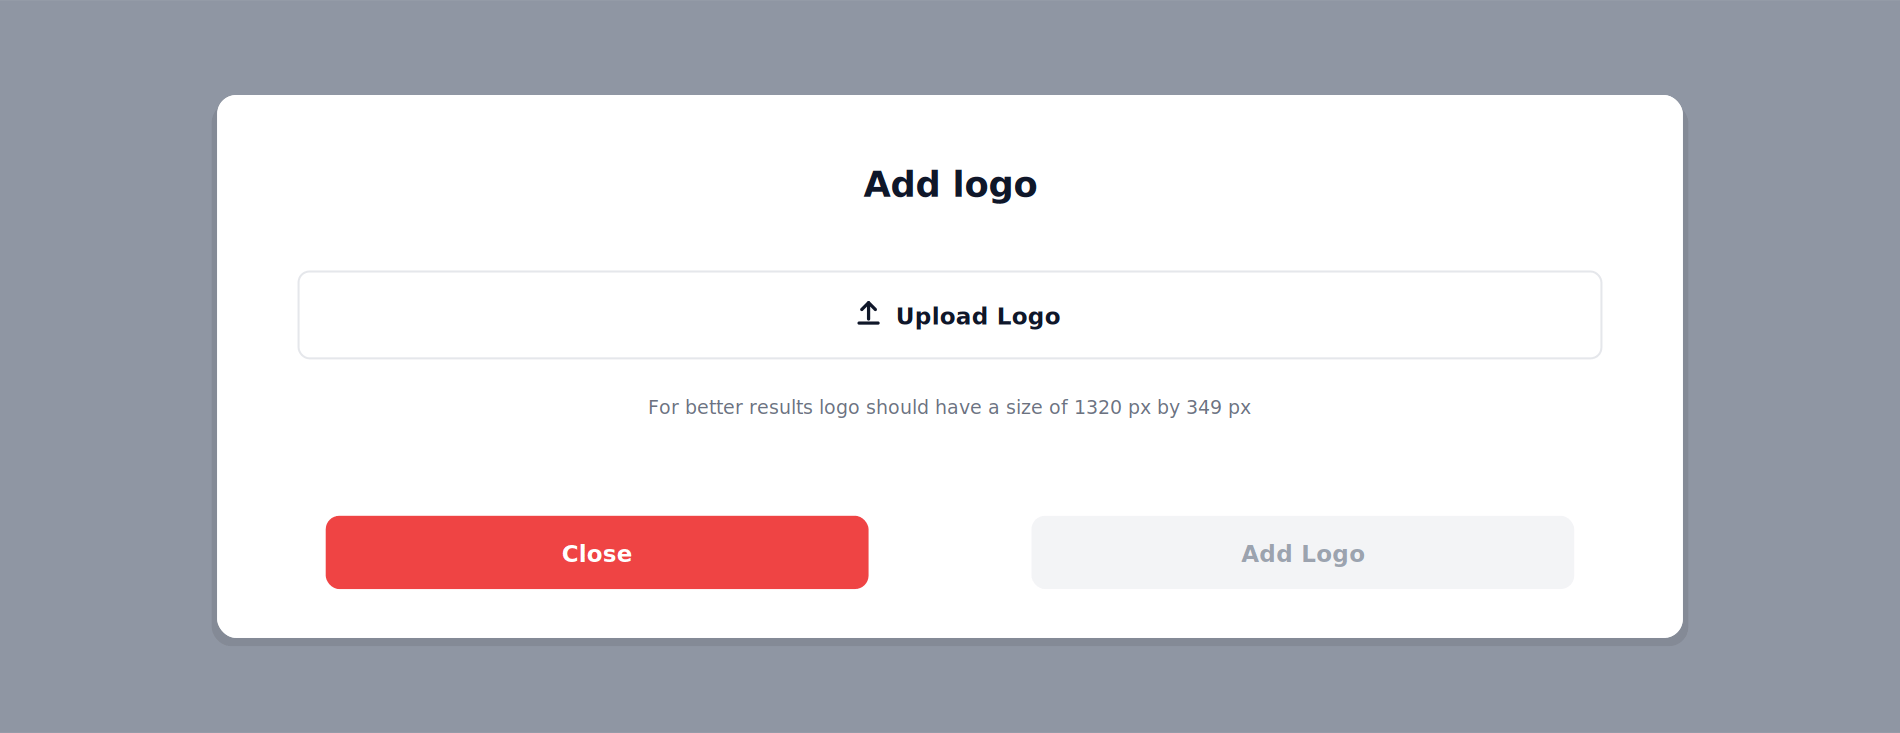
2
Select your logo file
Click the Upload Logo button inside the modal. Your system’s file picker opens — navigate to your logo file and select it. Only JPG/JPEG files are accepted.Once a file is selected, the Add Logo button at the bottom of the modal becomes active.
3
Save the logo
Click Add Logo at the bottom of the modal to save.The modal closes and your logo immediately replaces the PulsyAI default branding in the top-left of the sidebar — visible across every screen on your white-labeled platform.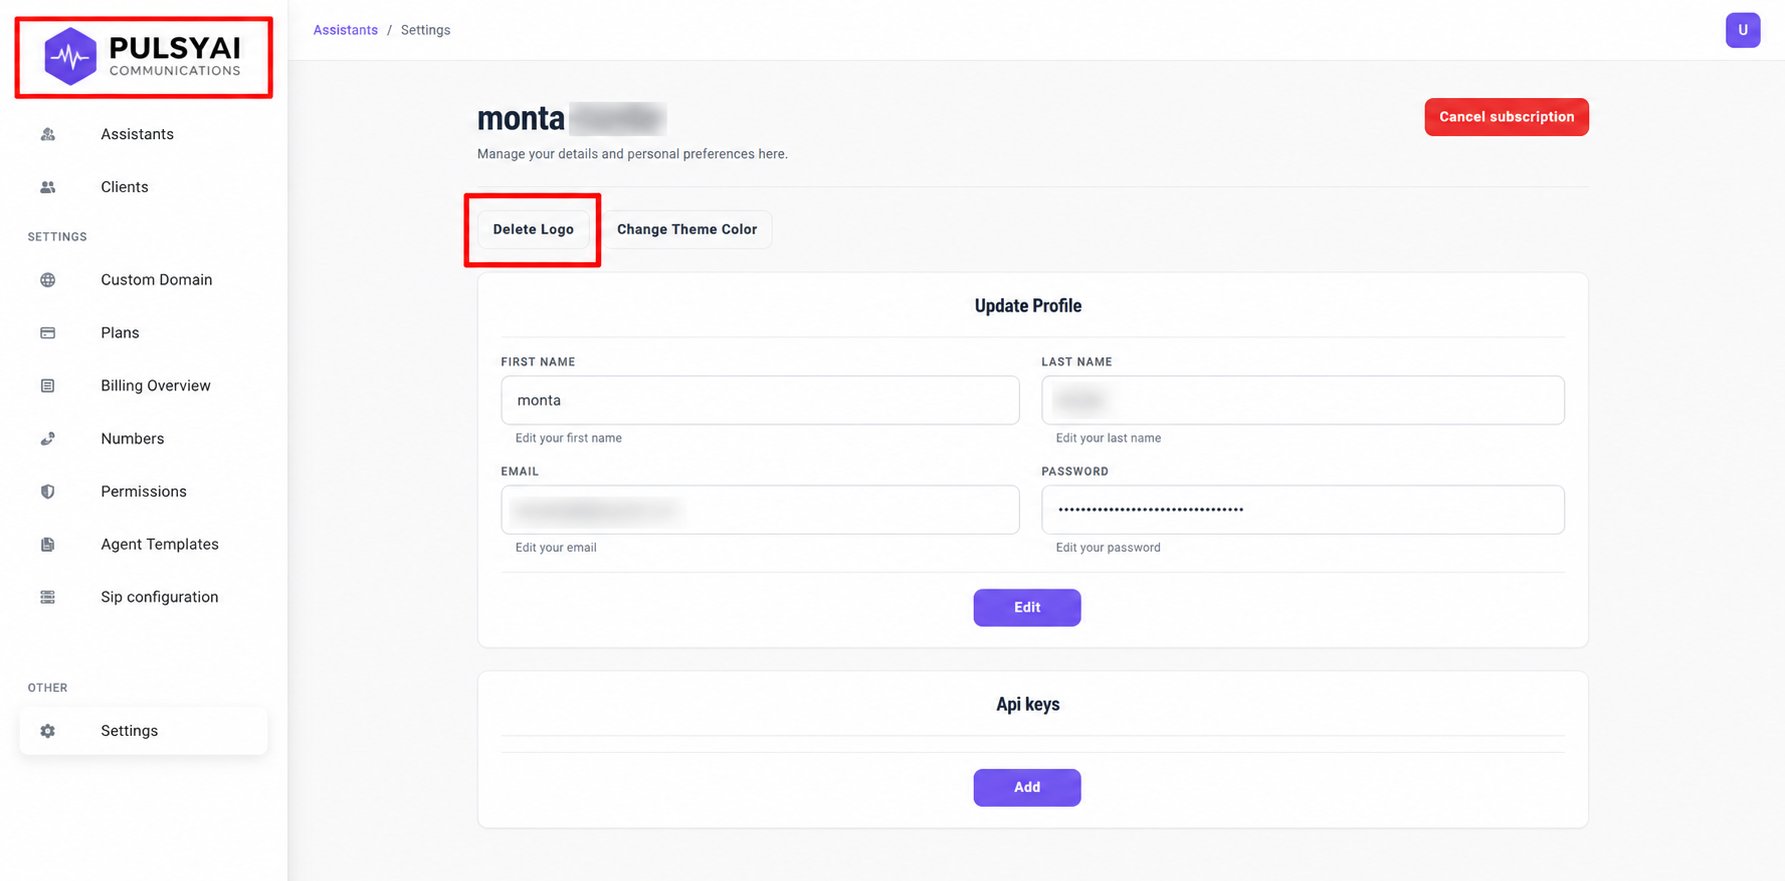
Change or remove your logo
Once a logo is uploaded, the Add Logo button on the Settings page changes to Delete Logo.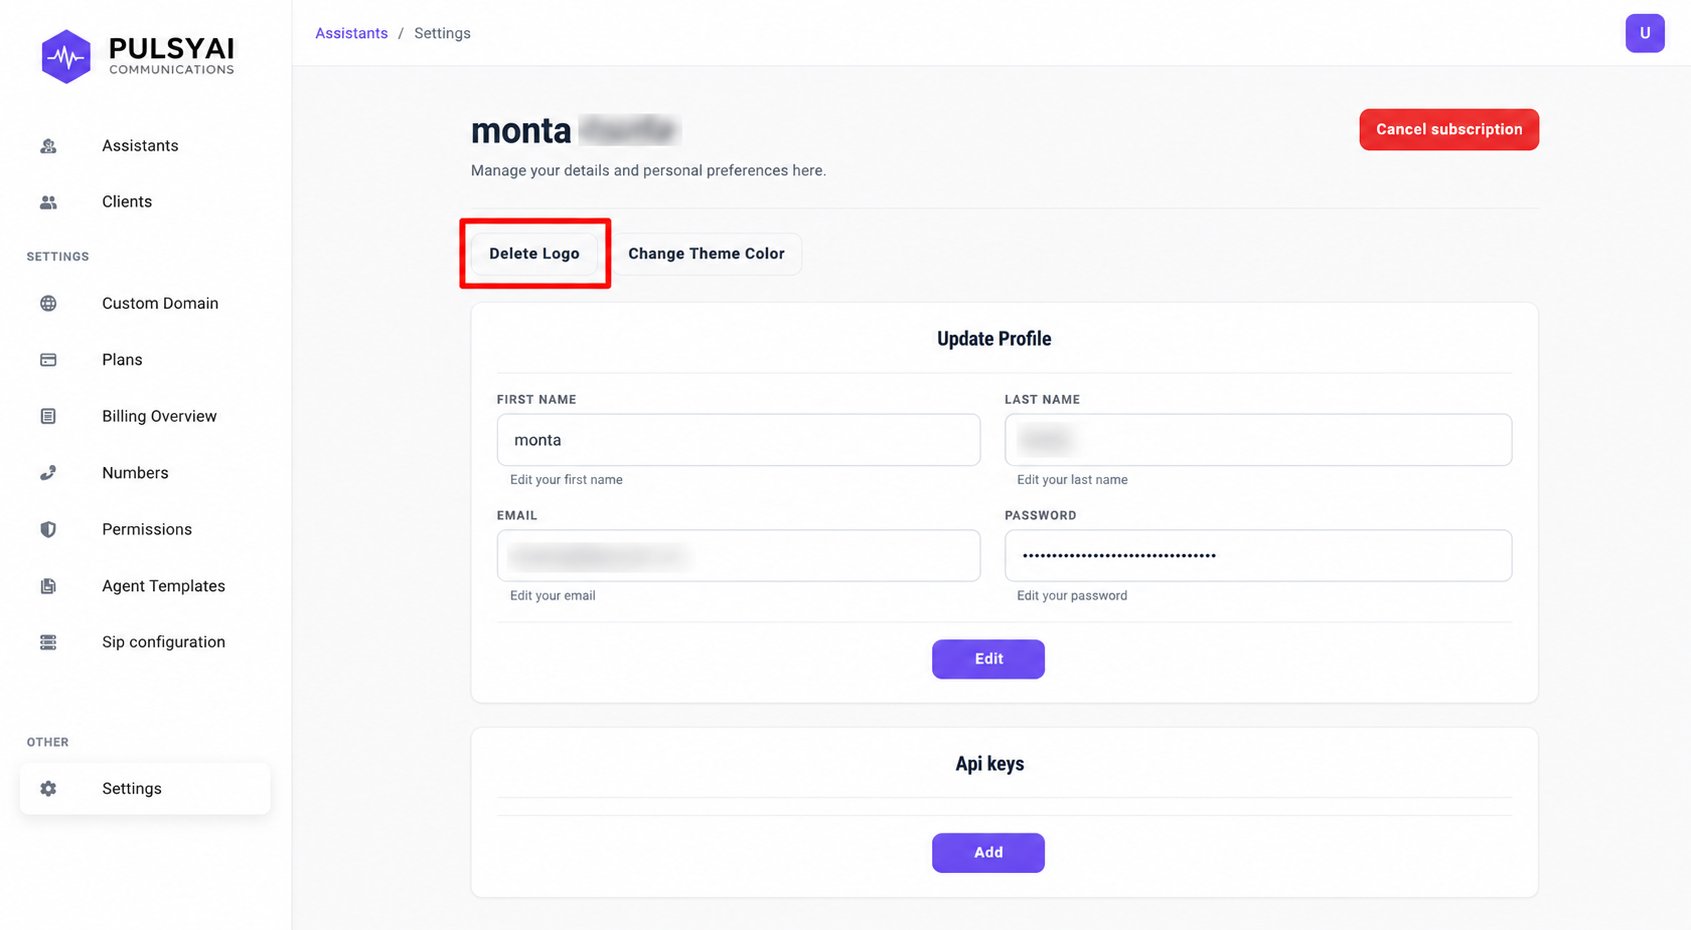
- Click Delete Logo to remove the current logo. The button reverts to Add Logo, and your platform displays the default PulsyAI branding until a new logo is uploaded.
- Click Add Logo again and follow the upload steps above with your new file.
Next step
Interface Colors
Customize the platform’s color scheme to match your brand identity.