> ## Documentation Index
> Fetch the complete documentation index at: https://docs.pulsyai.com/llms.txt
> Use this file to discover all available pages before exploring further.
# Custom Logo
> Upload your own logo to replace PulsyAI's branding across the entire interface. Step-by-step guide to image format, sizing, and where the logo appears.
A custom logo replaces PulsyAI's default branding across your white-labeled platform — your logo appears in the top-left of the sidebar, completing the visual rebrand for every end-client who logs in.
## Where to find Custom Logo
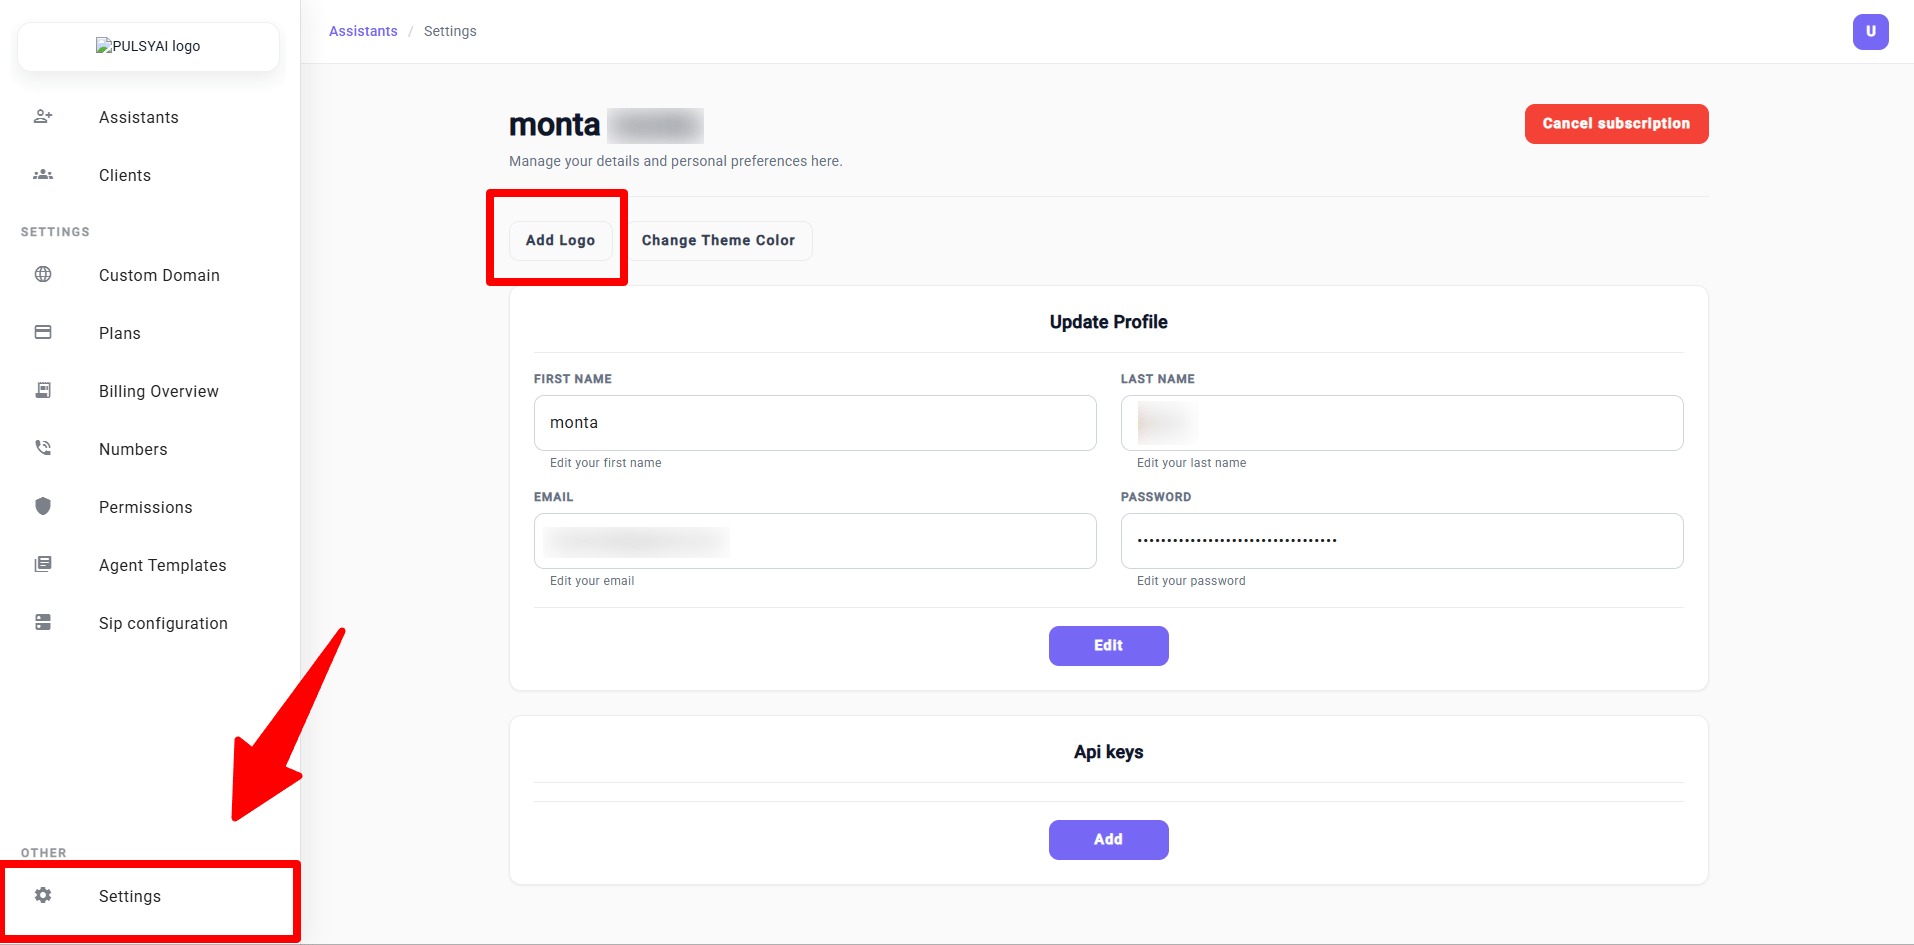
Custom Logo is configured from the **Settings** page in the white-label admin. Click **Settings** at the bottom of the left sidebar — two branding buttons, **Add Logo** and **Change Theme Color**, sit at the top of the Settings page, just below your account header.
 ## Logo specifications
Before uploading, prepare your logo file with these specifications:
* **Format:** JPG (JPEG) — the only supported format.
* **Recommended dimensions:** 1320 × 349 pixels (horizontal orientation, sized to fit the sidebar).
JPG format does not support transparent backgrounds — your logo will have a visible background color. For the cleanest appearance in the sidebar, export your logo with a white or light grey background that matches the surrounding interface, or design your logo to look intentional with its background filled.
## Upload your logo
From the Settings page, click the **Add Logo** button at the top. A modal opens with the upload interface and the recommended dimensions.
## Logo specifications
Before uploading, prepare your logo file with these specifications:
* **Format:** JPG (JPEG) — the only supported format.
* **Recommended dimensions:** 1320 × 349 pixels (horizontal orientation, sized to fit the sidebar).
JPG format does not support transparent backgrounds — your logo will have a visible background color. For the cleanest appearance in the sidebar, export your logo with a white or light grey background that matches the surrounding interface, or design your logo to look intentional with its background filled.
## Upload your logo
From the Settings page, click the **Add Logo** button at the top. A modal opens with the upload interface and the recommended dimensions.
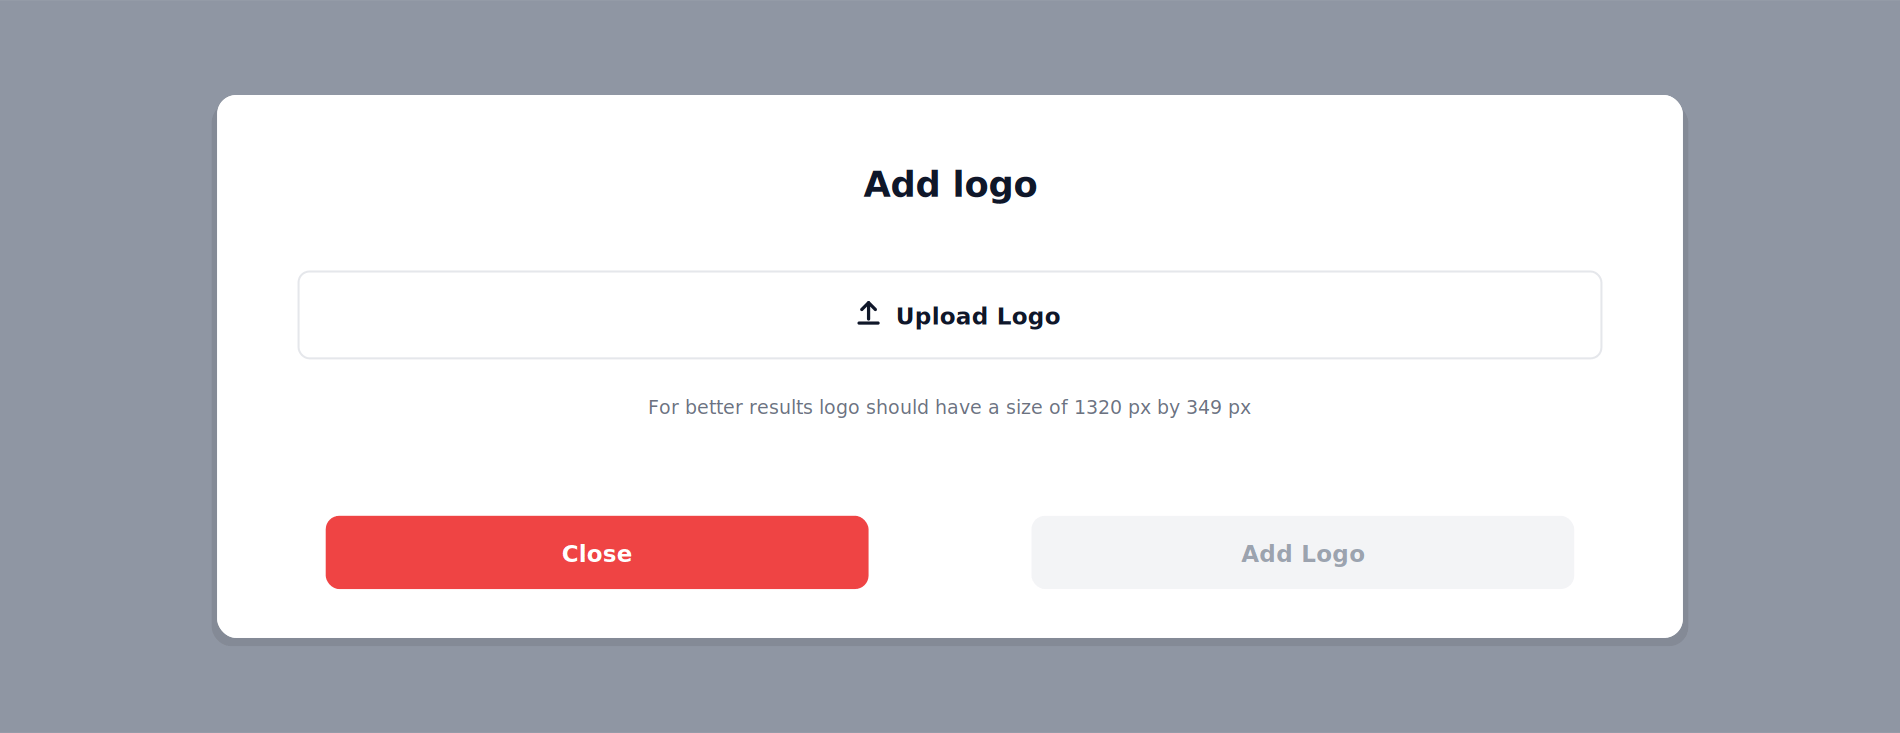 Click the **Upload Logo** button inside the modal. Your system's file picker opens — navigate to your logo file and select it. Only JPG/JPEG files are accepted.
Once a file is selected, the **Add Logo** button at the bottom of the modal becomes active.
Click **Add Logo** at the bottom of the modal to save.
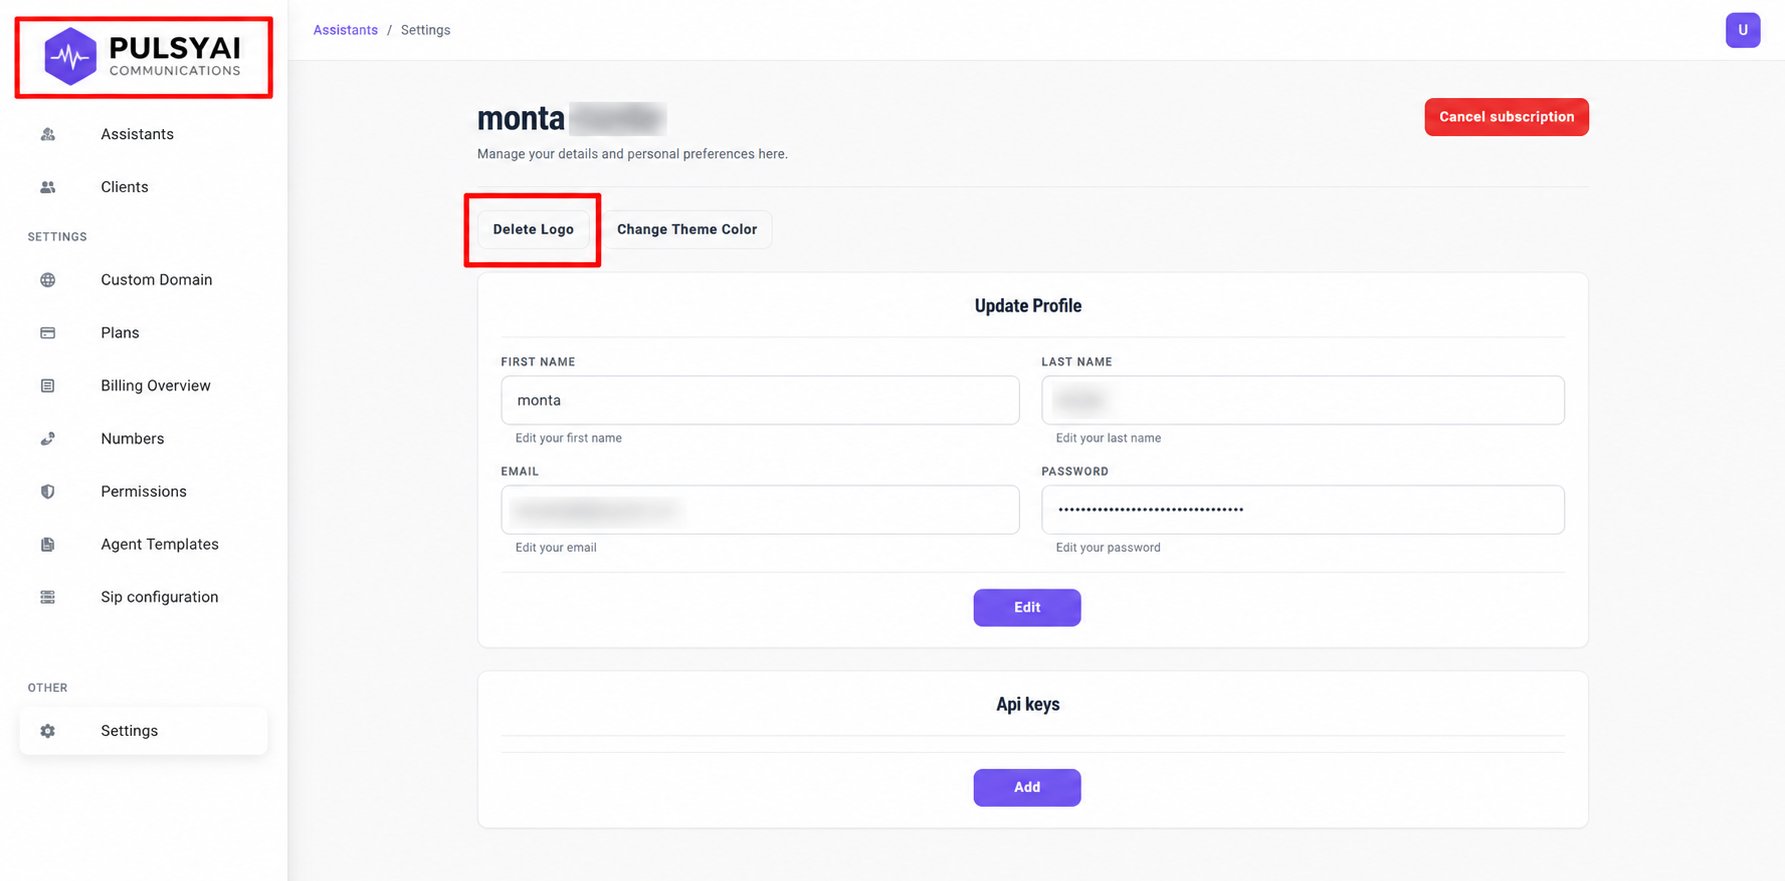
The modal closes and your logo immediately replaces the PulsyAI default branding in the top-left of the sidebar — visible across every screen on your white-labeled platform.
Click the **Upload Logo** button inside the modal. Your system's file picker opens — navigate to your logo file and select it. Only JPG/JPEG files are accepted.
Once a file is selected, the **Add Logo** button at the bottom of the modal becomes active.
Click **Add Logo** at the bottom of the modal to save.
The modal closes and your logo immediately replaces the PulsyAI default branding in the top-left of the sidebar — visible across every screen on your white-labeled platform.
 ## Change or remove your logo
Once a logo is uploaded, the **Add Logo** button on the Settings page changes to **Delete Logo**.
## Change or remove your logo
Once a logo is uploaded, the **Add Logo** button on the Settings page changes to **Delete Logo**.
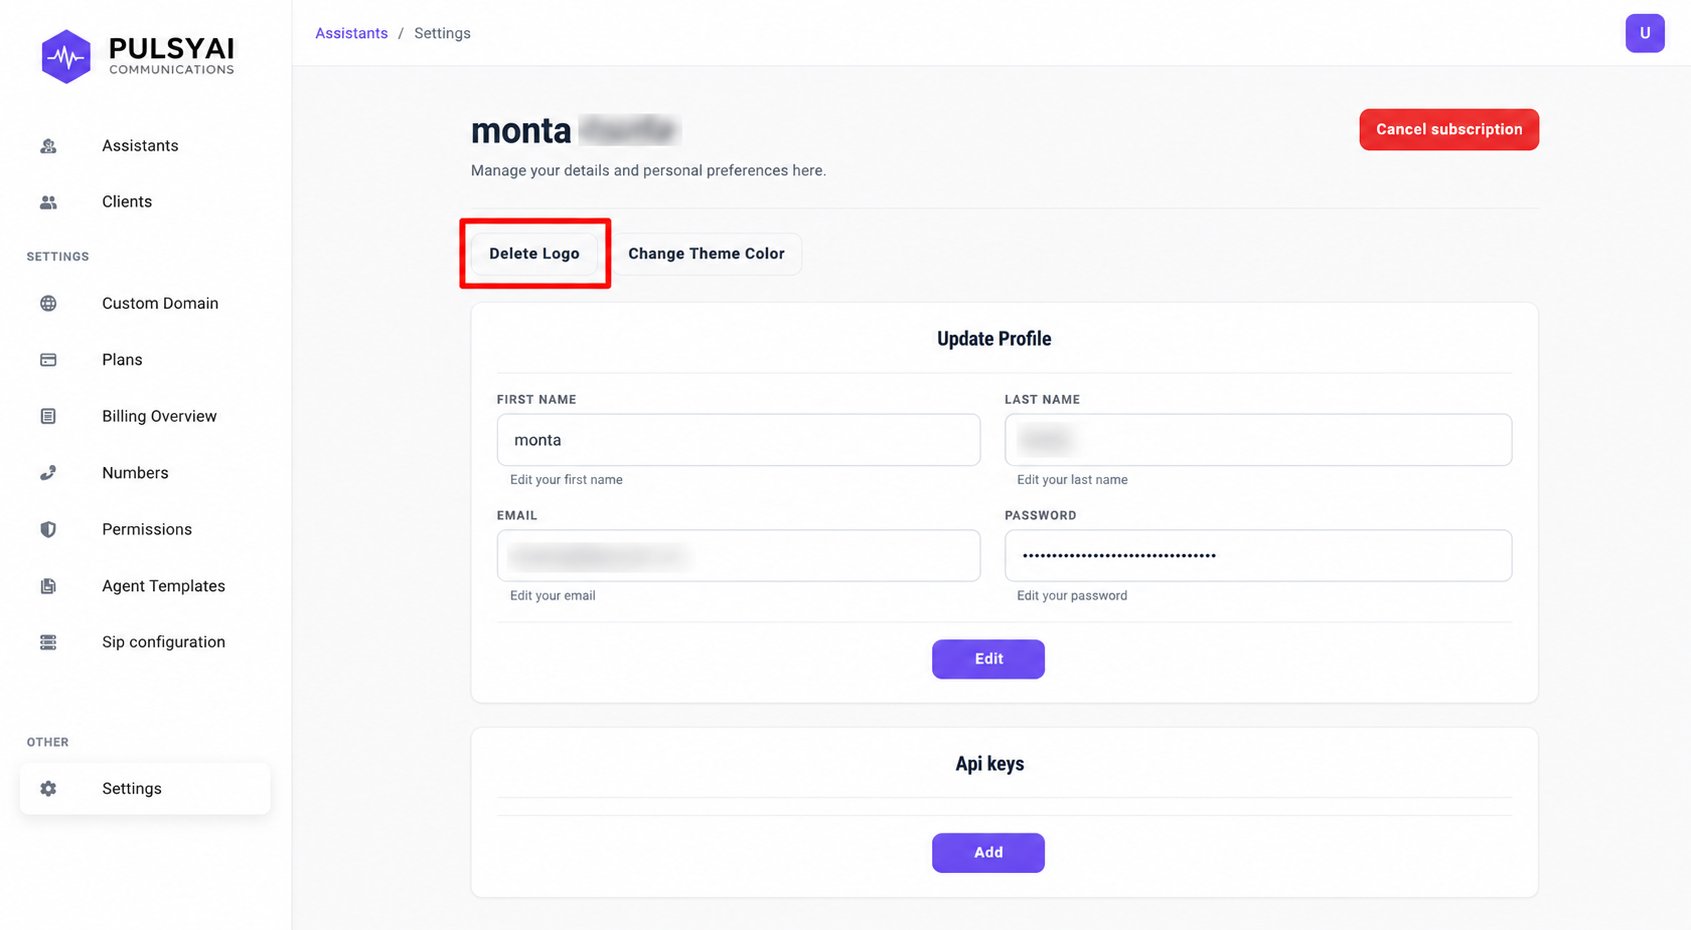 To **replace** an existing logo with a new one, follow the two-step flow:
1. Click **Delete Logo** to remove the current logo. The button reverts to **Add Logo**, and your platform displays the default PulsyAI branding until a new logo is uploaded.
2. Click **Add Logo** again and follow the upload steps above with your new file.
There is no separate "Replace" or "Edit" option — changing your logo requires deleting and re-uploading.
## Next step
Customize the platform's color scheme to match your brand identity.
To **replace** an existing logo with a new one, follow the two-step flow:
1. Click **Delete Logo** to remove the current logo. The button reverts to **Add Logo**, and your platform displays the default PulsyAI branding until a new logo is uploaded.
2. Click **Add Logo** again and follow the upload steps above with your new file.
There is no separate "Replace" or "Edit" option — changing your logo requires deleting and re-uploading.
## Next step
Customize the platform's color scheme to match your brand identity.