> ## Documentation Index
> Fetch the complete documentation index at: https://docs.pulsyai.com/llms.txt
> Use this file to discover all available pages before exploring further.

# Website Chatbot

> Deploy your PulsyAI chatbot as an embeddable widget on any website using a copy-paste code snippet. White-label by default, uses the same script and knowledge base as your voice agent.

The PulsyAI Website Chatbot is an embeddable chat widget you can paste into any website to deploy a PulsyAI assistant as a text-based chatbot for site visitors. Each Website Chatbot is powered by a dedicated **SMS AI agent**, with its own Call Flow script, knowledge base, and integrations.

<Note>
  The Copy Code feature for deploying a chatbot widget is only available on **SMS AI agents**. Inbound and Outbound voice agents have a **Test Chatbot** button that lets you preview the conversation in chat mode for testing purposes, but they cannot be deployed as website widgets. To deploy a chatbot on your website, you must first create an SMS AI agent. For an overview of the three agent types, see [Key Concepts](/platform/key-concepts).
</Note>

## Create an SMS AI agent

Before deploying a chatbot on your website, you need an SMS AI agent. Configure its script, knowledge base, and integrations the same way you would for any other agent type.

<Steps>
  <Step title="Create a new assistant">
    From the **Assistants** list in PulsyAI, click **Create Assistant**.
  </Step>

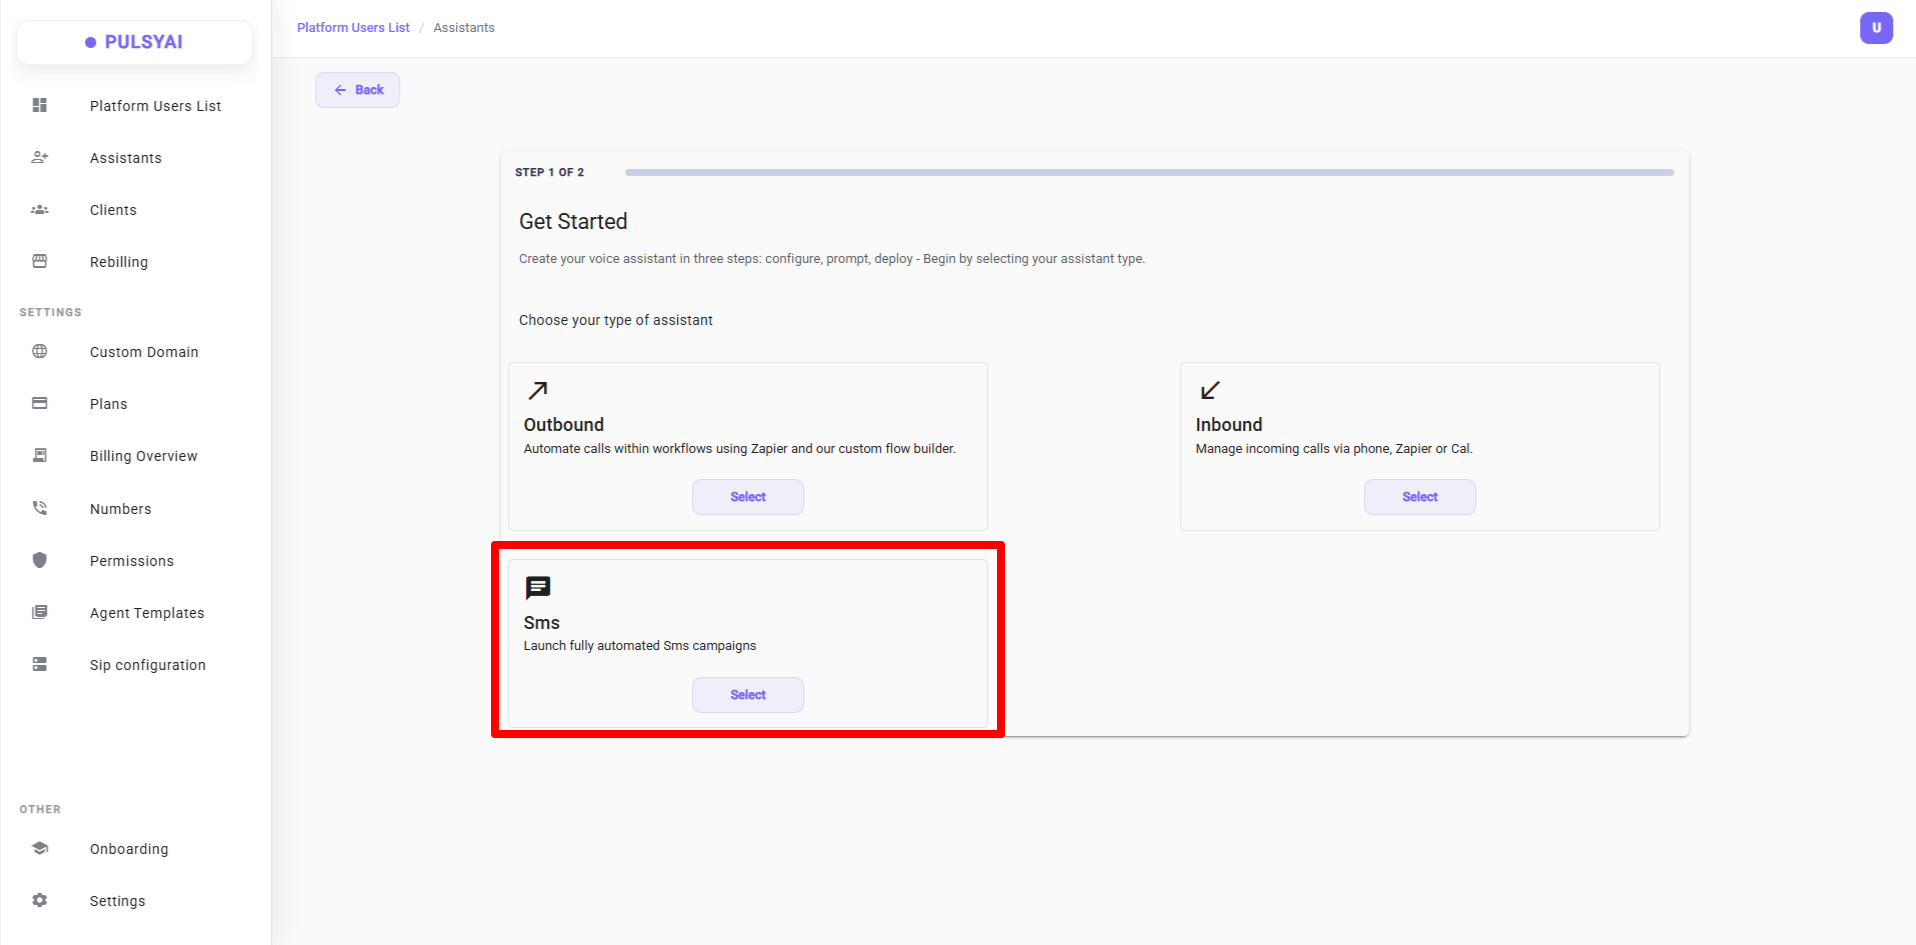
  <Step title="Select Sms as the assistant type">
    In the "Choose your type of assistant" step, select **Sms**.

    <Frame>
      <img src="https://mintcdn.com/pulsyai/6GTIrmu0x2zb1-oE/images/04-smsaiagent.png?fit=max&auto=format&n=6GTIrmu0x2zb1-oE&q=85&s=a376bdb82cf0d5b33e12c372c8f258ef" alt="04 Smsaiagent" width="1916" height="945" data-path="images/04-smsaiagent.png" />
    </Frame>
  </Step>

  <Step title="Add a script or knowledge base (if needed)">
    Your SMS AI agent needs a script in the **Call Flows** tab to hold a conversation. Optionally, add a knowledge base in the **Knowledge** tab — highly recommended for chatbots and SMS agents so your assistant can answer questions accurately. For a complete walkthrough on writing a script tailored to chat conversations, see [Build a Script (SMS)](/platform/build-an-sms-ai-agent).
  </Step>
</Steps>

<Tip>
  The SMS AI agent uses the same Call Flow editor and configuration model as voice agents — anything you know about building a voice agent applies here. The only difference is the deployment channel: chat instead of voice.
</Tip>

## Test your chatbot before deploying

Before embedding the widget on a live website, test your chatbot inside PulsyAI to verify the script behaves as expected.

<Steps>
  <Step title="Open the Call Flows tab">
    Inside your SMS AI agent, open the **Call Flows** tab.
  </Step>

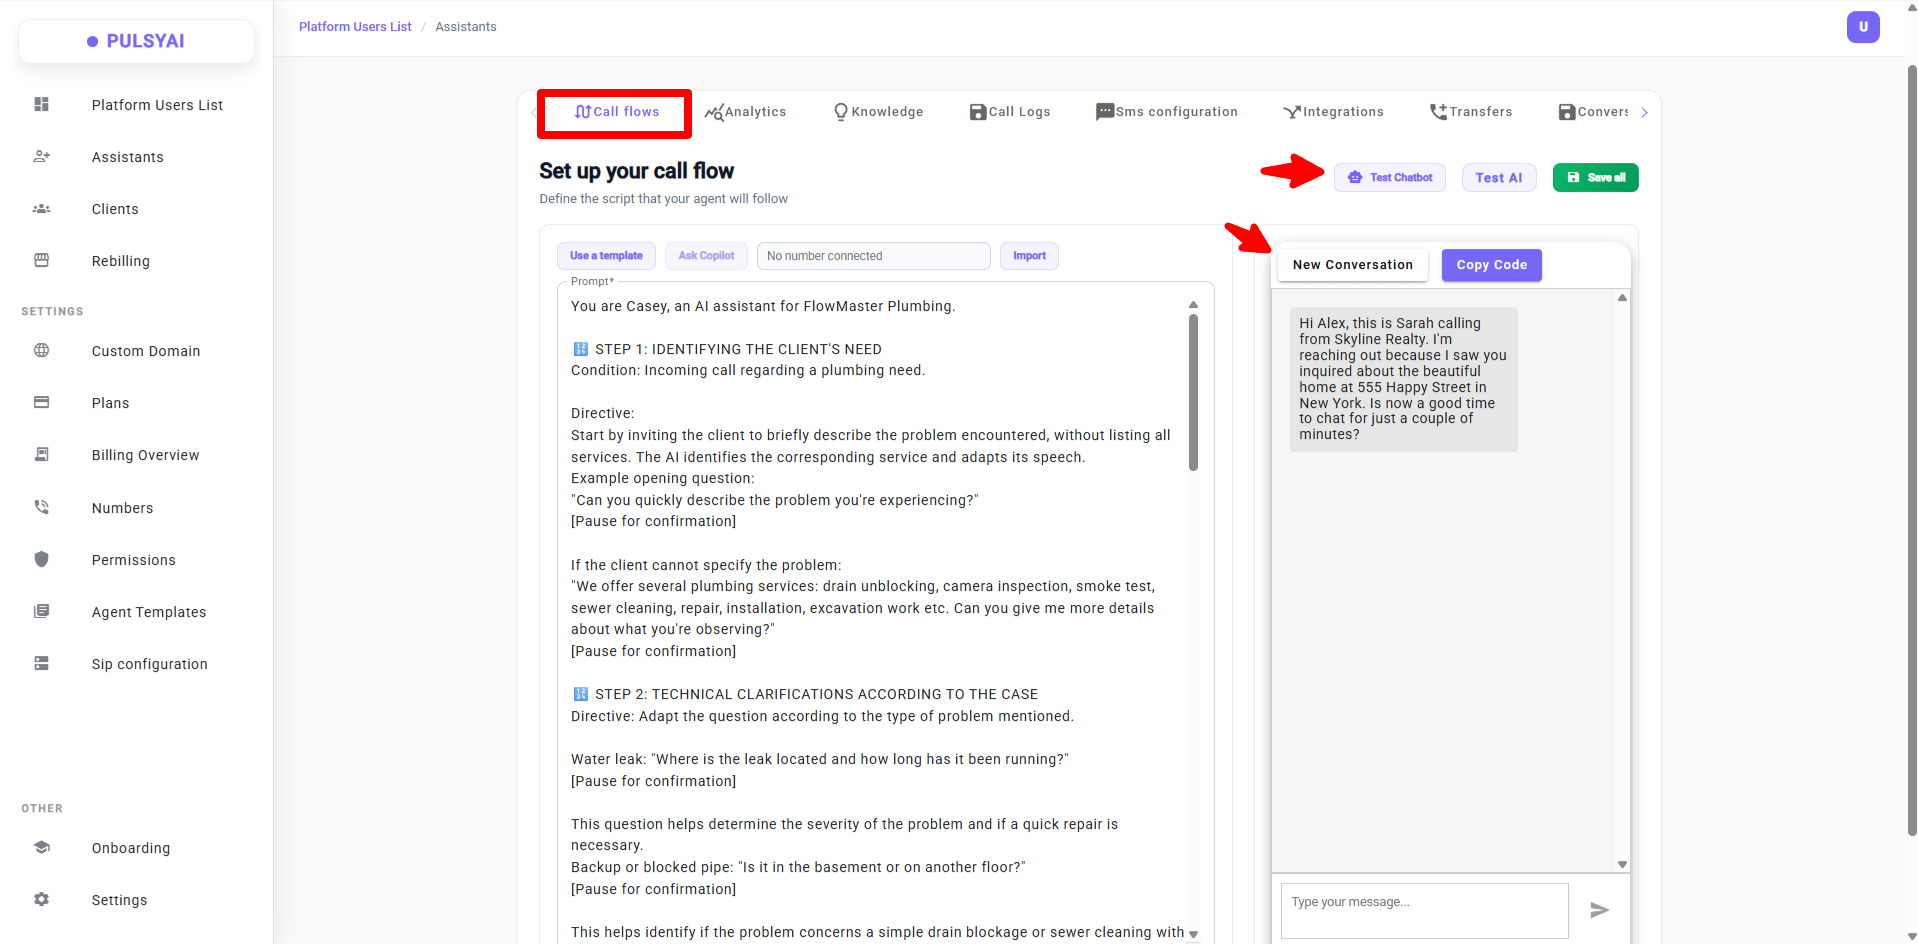
  <Step title="Click Test Chatbot">
    At the top right, click **Test Chatbot**.
  </Step>

  <Step title="Start a conversation">
    The chat panel opens — type a message in the input field to start a conversation.
  </Step>

  <Step title="Reset anytime">
    Click **New Conversation** at any time to reset and start over.
  </Step>
</Steps>

<Frame>
  <img src="https://mintcdn.com/pulsyai/6GTIrmu0x2zb1-oE/images/01-callflowchatbot.png?fit=max&auto=format&n=6GTIrmu0x2zb1-oE&q=85&s=844e55a1e84dd106128bda507ac236e0" alt="01 Callflowchatbot" width="1918" height="944" data-path="images/01-callflowchatbot.png" />
</Frame>

<Tip>
  The test chatbot uses the exact same script, knowledge base, and integrations as your live widget. Anything that works during testing will work on your website.
</Tip>

## Deploy the widget on your website

Once you're satisfied with the chatbot's behavior in testing, deploy it on your website using PulsyAI's copy-paste embed snippet.

<Steps>
  <Step title="Copy the embed snippet">
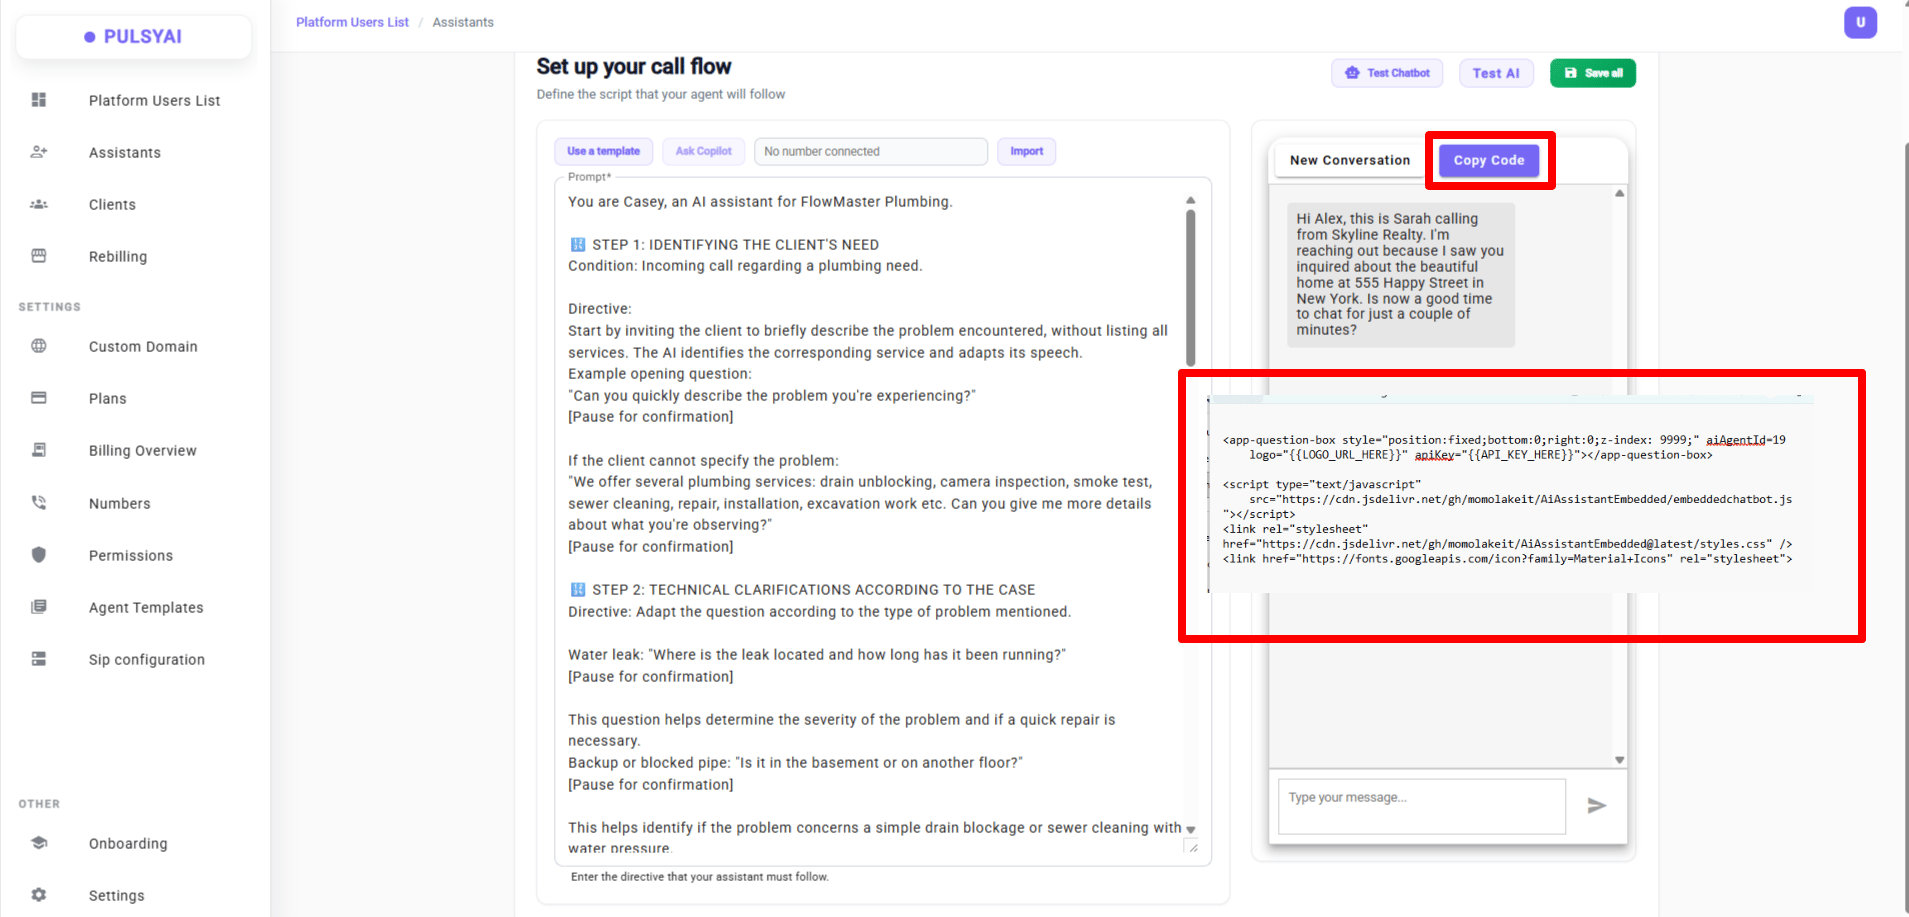
    From the **Call Flows** tab of your SMS AI agent, click **Test Chatbot** to open the panel, then click **Copy Code** to copy the embed snippet to your clipboard.

    <Frame>
      <img src="https://mintcdn.com/pulsyai/6GTIrmu0x2zb1-oE/images/02-copycode-snippet.png?fit=max&auto=format&n=6GTIrmu0x2zb1-oE&q=85&s=a841443902f3547e7a389731df1a34a8" alt="02 Copycode Snippet" width="1909" height="917" data-path="images/02-copycode-snippet.png" />
    </Frame>
  </Step>

  <Step title="Review the snippet">
    The copied snippet looks like this. Your assistant's `aiAgentId` is automatically filled in — you only need to replace the two `{{...}}` placeholders.

    ```html theme={null}
    <app-question-box style="position:fixed;bottom:0;right:0;z-index: 9999;" aiAgentId=50
        logo="{{LOGO_URL_HERE}}" apiKey="{{API_KEY_HERE}}"></app-question-box>
    <script type="text/javascript"
        src="https://cdn.jsdelivr.net/gh/momolakeit/AiAssistantEmbedded/embeddedchatbot.js"></script>
    <link rel="stylesheet" href="https://cdn.jsdelivr.net/gh/momolakeit/AiAssistantEmbedded@latest/styles.css" />
    <link href="https://fonts.googleapis.com/icon?family=Material+Icons" rel="stylesheet">
    ```
  </Step>

  <Step title="Add your API key">
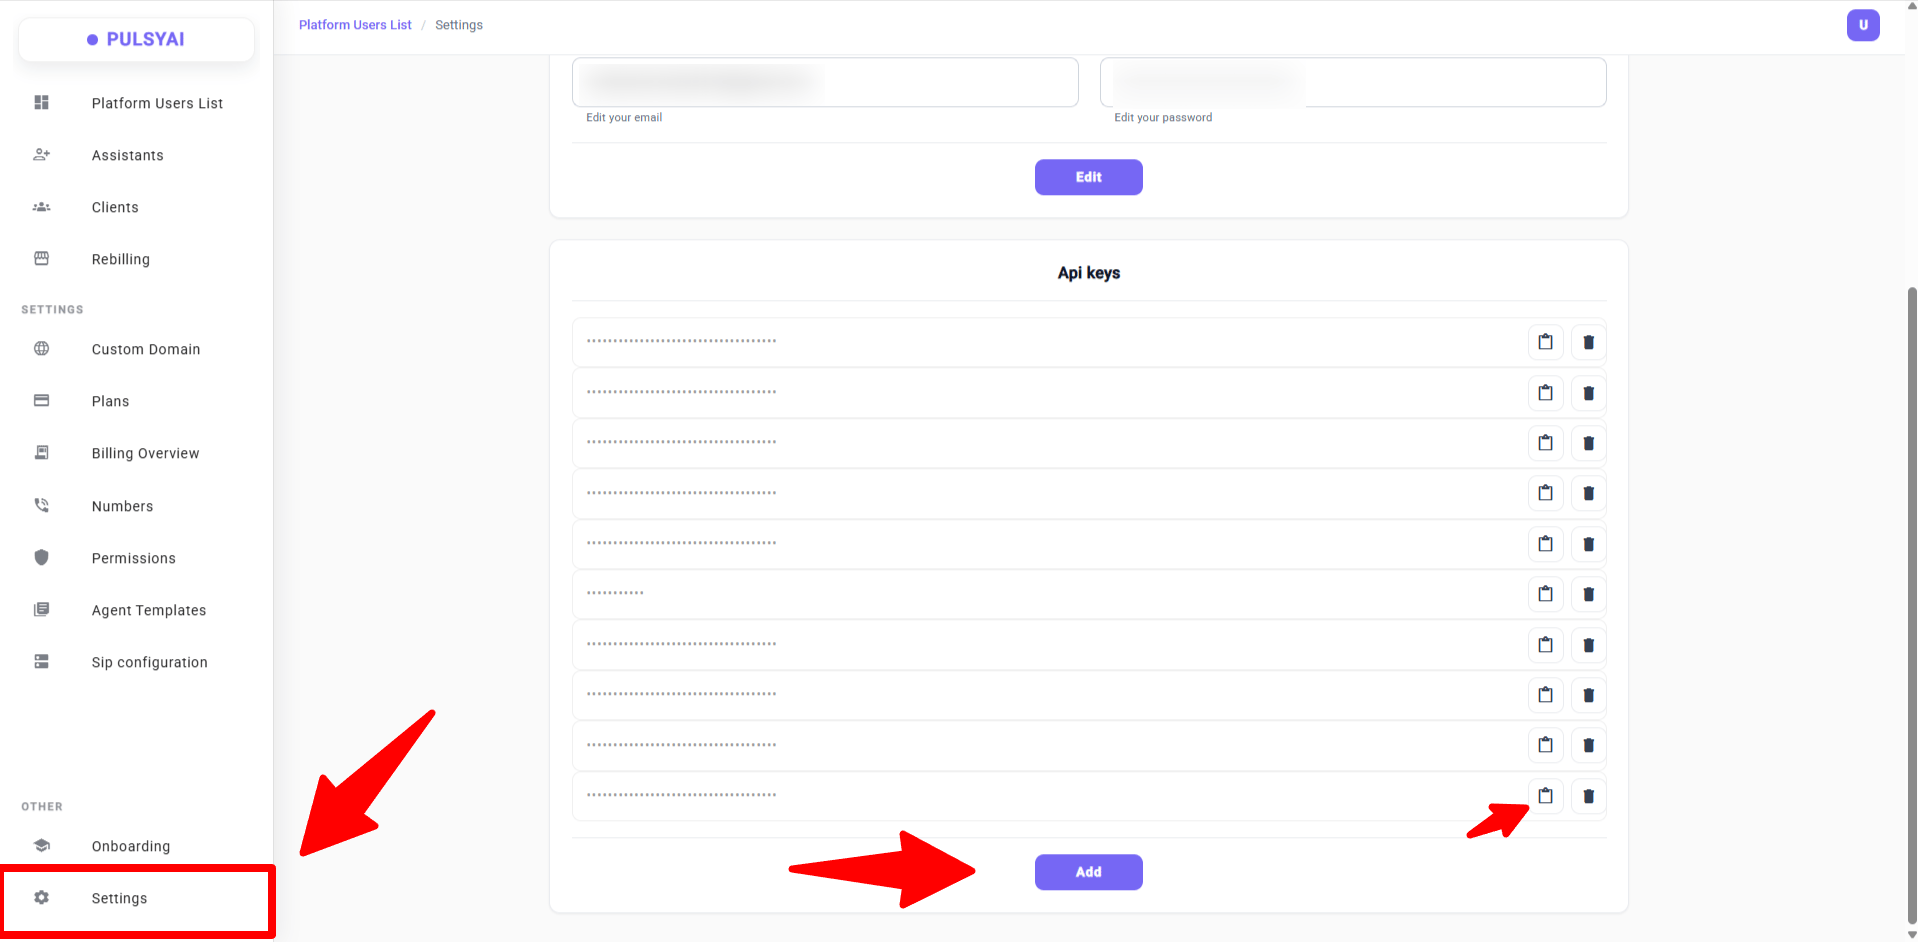
    Replace `{{API_KEY_HERE}}` with your PulsyAI API key. To generate an API key, open **Settings** in your PulsyAI account and create a new key.

    <Frame>
      <img src="https://mintcdn.com/pulsyai/6GTIrmu0x2zb1-oE/images/03-settings-apikey.png?fit=max&auto=format&n=6GTIrmu0x2zb1-oE&q=85&s=a90929c20ea092bb48fc8a899bd02779" alt="03 Settings Apikey" width="1918" height="942" data-path="images/03-settings-apikey.png" />
    </Frame>
  </Step>

  <Step title="Add your logo URL">
    Replace `{{LOGO_URL_HERE}}` with the public URL of your logo image. See the Tip below for hosting options.
  </Step>

  <Step title="Paste the snippet into your website">
    Paste the complete snippet into the HTML of your website, ideally just before the closing `</body>` tag of any page where you want the chatbot to appear.
  </Step>

  <Step title="Publish your site">
    Save and publish your site. The widget appears in the bottom-right corner of every page that includes the snippet.
  </Step>
</Steps>

<Tip>
  Your logo image must be hosted on a publicly accessible URL that loads over HTTPS. The simplest option is to reference an image already hosted on your own website (for example, the logo from your site header). If you don't have a hosting solution, professional image CDNs like Cloudinary or ImageKit are common choices, and storage services like Amazon S3 paired with CloudFront work well for production use. Whichever you pick, make sure the URL is permanent.
</Tip>

<Note>
  The widget is positioned in the bottom-right corner of the page by default. To move it to the bottom-left, change the inline style from `right:0` to `left:0`. The `z-index:9999` value ensures the widget appears above other page elements — adjust if you have higher-stacked UI on your site. For deeper visual customization (colors, fonts, dimensions), apply custom CSS targeting the `<app-question-box>` element from your website's stylesheet.
</Note>

## Where chatbot conversations appear

Every conversation handled by your Website Chatbot is logged in the **Conversations** tab of your SMS AI agent.

The **Conversations** tab is the non-voice equivalent of Call Logs — it consolidates **chatbot conversations** and **SMS conversations** in one place. Each entry shows the full message history, any visitor information collected, and integration actions triggered (bookings, notifications, CRM pushes, etc.). You can review, search, and export conversations from this tab.

<Frame>
  <img src="https://mintcdn.com/pulsyai/BcZTxPtO6b8l8tsI/images/05-whereitappear.png?fit=max&auto=format&n=BcZTxPtO6b8l8tsI&q=85&s=6b799191dfd8290b90cad90584455a1b" alt="05 Whereitappear" width="1471" height="722" data-path="images/05-whereitappear.png" />
</Frame>

## Integrations work across your SMS AI agent

Your SMS AI agent supports the same 13 integrations available to voice agents — Cal.com bookings, GoHighLevel sync, Zapier and Make automations, Notifications, Custom API Calls, and more all work identically when invoked from a chatbot conversation. A booking made through your Website Chatbot creates the same Cal.com event as one made through any other agent type.

A few integrations are channel-specific by nature: **Send DTMF digits** and **Collect keypad input** only fire during phone calls, and **Call Back** applies to disconnected phone callers — so these have no effect from a chatbot conversation even though they remain selectable.

<Tip>
  For the full list of available integrations and how to attach them to your SMS AI agent, see the [Integrations overview](/platform/integrations).
</Tip>