> ## Documentation Index
> Fetch the complete documentation index at: https://docs.pulsyai.com/llms.txt
> Use this file to discover all available pages before exploring further.
# Integrations
> Connect PulsyAI to CRMs, calendars, Zapier, Make, custom webhooks, and notification systems so your AI agents push data and trigger workflows automatically.
An integration in PulsyAI is a connection between your AI agent and an external system — a calendar, CRM, messaging channel, automation platform, or custom API — that lets your assistant take real actions during a conversation. Integrations are configured at the agent level: each assistant has its own list, found in the **Integrations** tab inside an assistant. After saving, some integrations need to be attached to a specific Call Flow step via **+ Connect Action**; others run automatically.
## How to add an integration
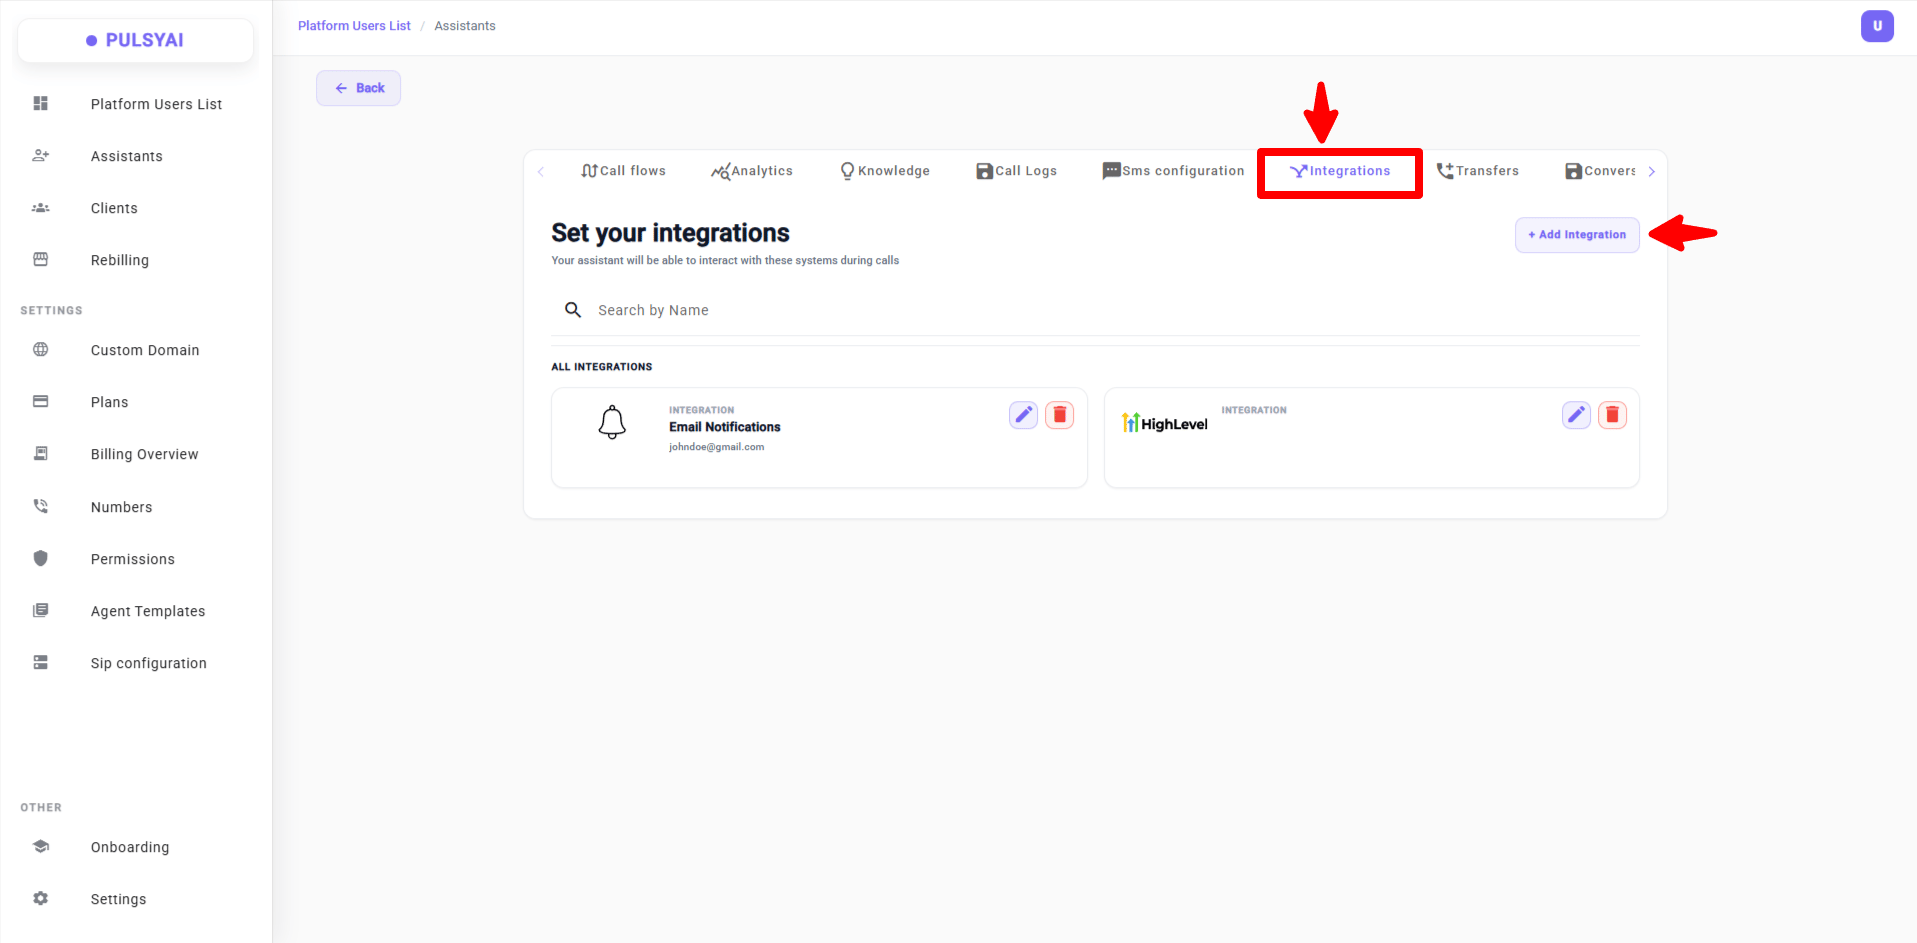
Open your assistant and click the **Integrations** tab.
Click **+ Add Integration** at the top right.
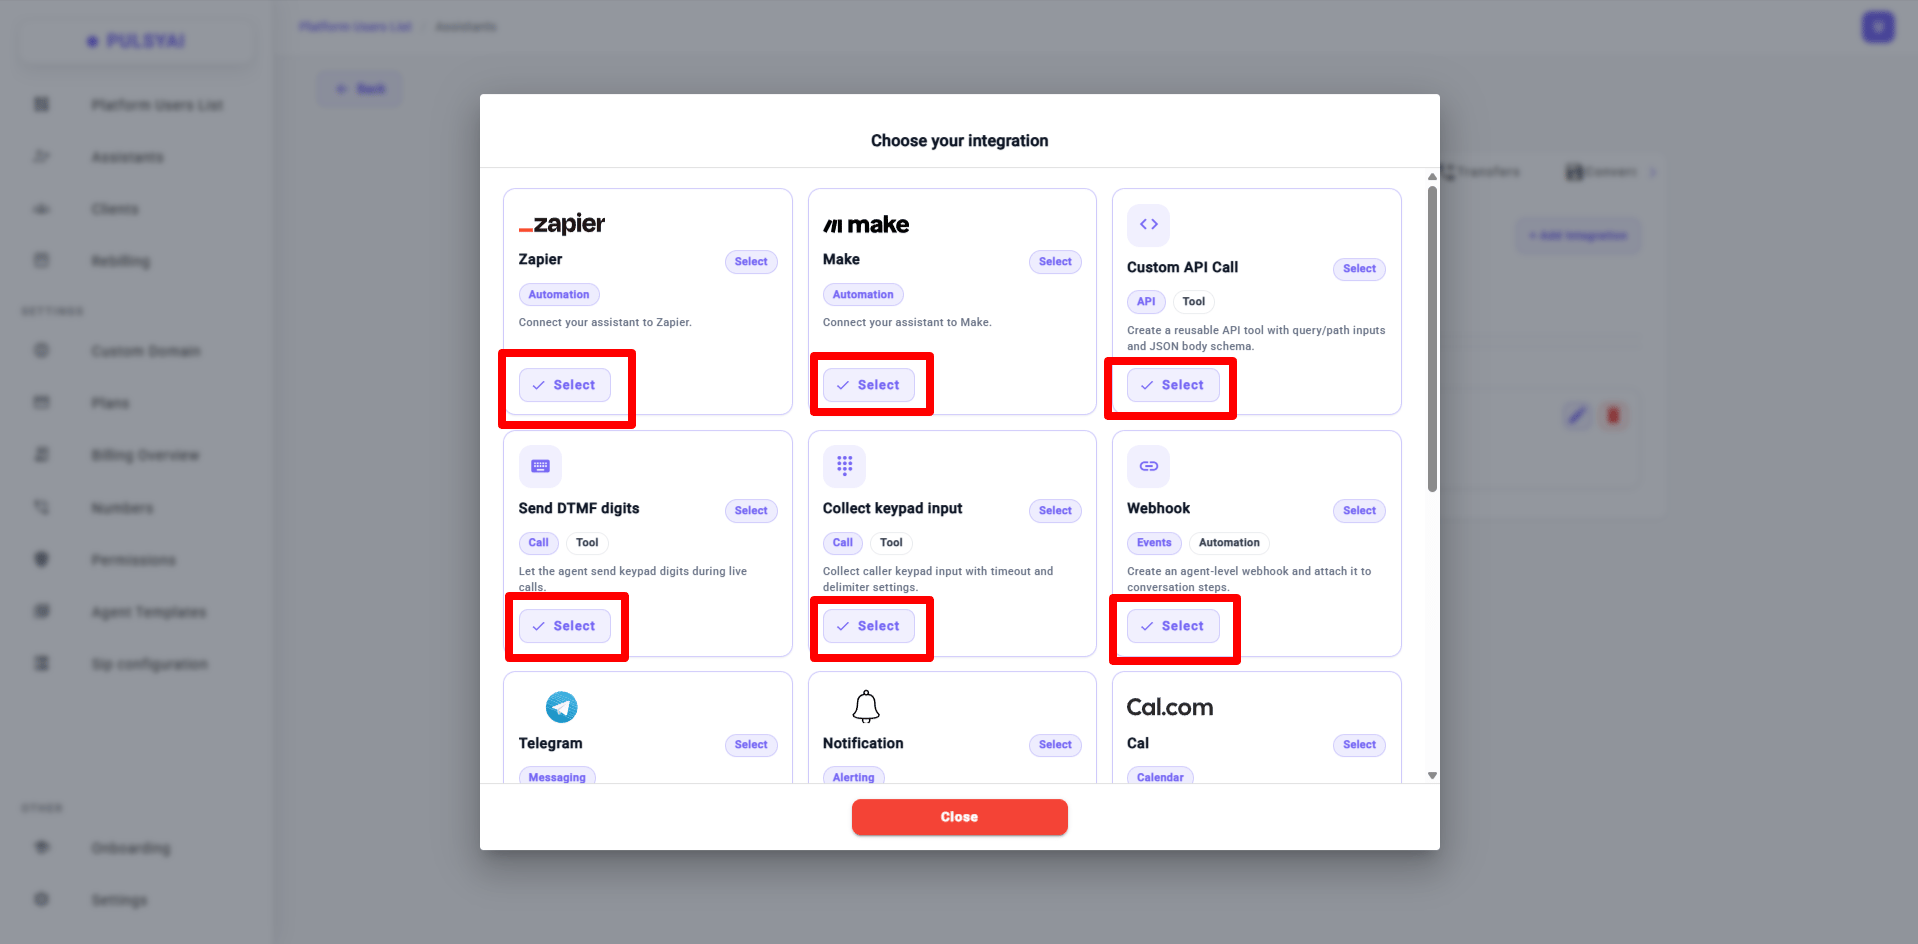
 In the **Choose your integration** modal, click **Select** on the integration you want.
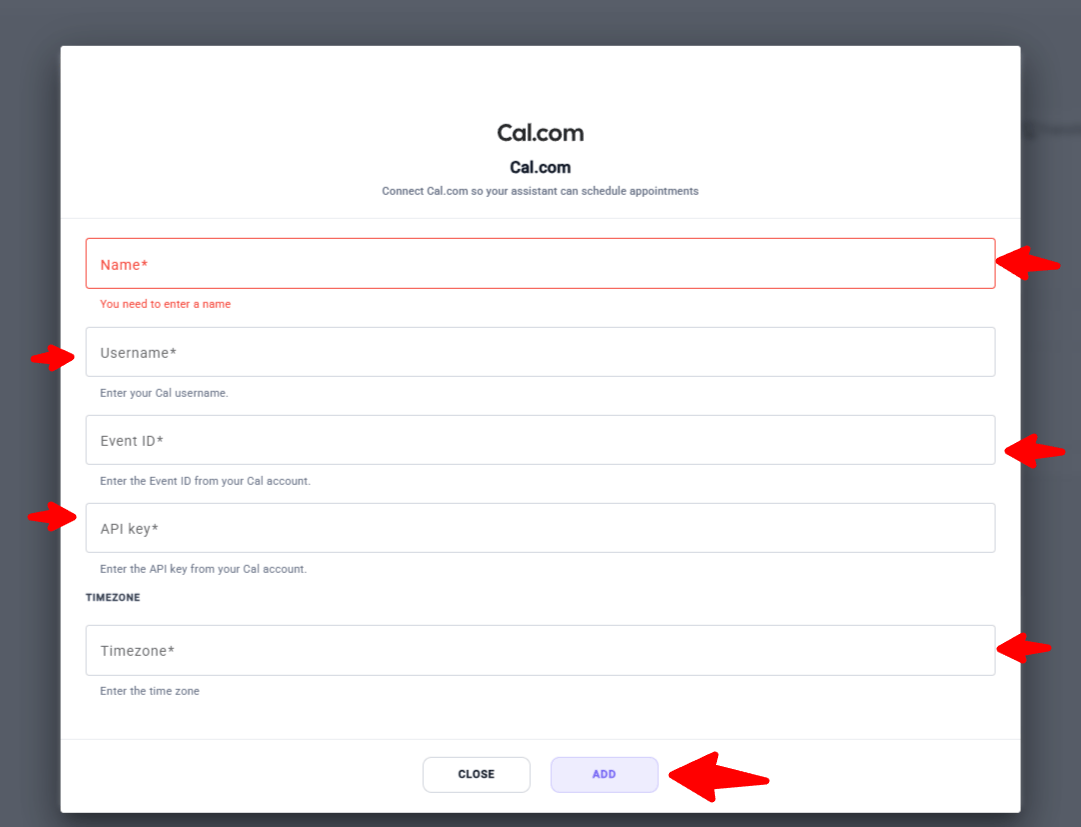
 Fill in the required fields, then click **Add** or **Save**.
Open the **Call Flows** tab → click the step where the integration should fire → click **+ Connect Action** → if your integration appears in the list, attach it. If it doesn't appear, the integration runs automatically — no further action needed.
## Defining extractable fields
An extractable field is a piece of structured data your PulsyAI voice agent collects from the live conversation and passes to a connected integration.
Many PulsyAI integrations (Zapier, Make, Notifications, and others that send structured call data) share the same 4-input pattern for each field you want to capture:
* **Field name** — the human-readable name of the data point.
* **Field description** — the instruction that tells the LLM what to extract. The clearer this is, the more accurate the extraction.
* **Field key** — the exact key your downstream integration expects (must match your Zap, scenario, or notification template).
* **Data type** — string, number, or boolean.
The Field description is the most important input — write it as if you were briefing a new assistant about exactly what to listen for during the call.
## Available integrations
PulsyAI ships with integrations across seven categories. Each one is configured from the **Integrations** tab inside your assistant.
Cal.com
GoHighLevel
Telegram, Meta pages
Zapier, Make, Webhook, Call Back, Stale Conversations
Send DTMF digits, Collect keypad input
Custom API Call
Notifications
## Cal.com
Cal.com is a calendar integration that lets your PulsyAI voice agent book appointments directly into your Cal.com schedule during a phone call.
Configuration fields:
* **Name** — any descriptive name.
* **Username** — your Cal username.
* **Event ID** — from your Cal account; identifies the specific event type.
* **API key** — from your Cal account.
* **Timezone**.
To offer multiple booking types (free consultation, paid consultation, follow-up call), add Cal.com multiple times with different Event IDs — one integration per event type.
Once an appointment is booked into Cal.com by your PulsyAI voice agent, Cal.com automatically syncs it to your team's downstream calendars — Google Calendar, Outlook, Apple Calendar, and any other calendar source connected inside your Cal.com account. You configure those calendar syncs directly in Cal.com, not in PulsyAI.
Fill in the required fields, then click **Add** or **Save**.
Open the **Call Flows** tab → click the step where the integration should fire → click **+ Connect Action** → if your integration appears in the list, attach it. If it doesn't appear, the integration runs automatically — no further action needed.
## Defining extractable fields
An extractable field is a piece of structured data your PulsyAI voice agent collects from the live conversation and passes to a connected integration.
Many PulsyAI integrations (Zapier, Make, Notifications, and others that send structured call data) share the same 4-input pattern for each field you want to capture:
* **Field name** — the human-readable name of the data point.
* **Field description** — the instruction that tells the LLM what to extract. The clearer this is, the more accurate the extraction.
* **Field key** — the exact key your downstream integration expects (must match your Zap, scenario, or notification template).
* **Data type** — string, number, or boolean.
The Field description is the most important input — write it as if you were briefing a new assistant about exactly what to listen for during the call.
## Available integrations
PulsyAI ships with integrations across seven categories. Each one is configured from the **Integrations** tab inside your assistant.
Cal.com
GoHighLevel
Telegram, Meta pages
Zapier, Make, Webhook, Call Back, Stale Conversations
Send DTMF digits, Collect keypad input
Custom API Call
Notifications
## Cal.com
Cal.com is a calendar integration that lets your PulsyAI voice agent book appointments directly into your Cal.com schedule during a phone call.
Configuration fields:
* **Name** — any descriptive name.
* **Username** — your Cal username.
* **Event ID** — from your Cal account; identifies the specific event type.
* **API key** — from your Cal account.
* **Timezone**.
To offer multiple booking types (free consultation, paid consultation, follow-up call), add Cal.com multiple times with different Event IDs — one integration per event type.
Once an appointment is booked into Cal.com by your PulsyAI voice agent, Cal.com automatically syncs it to your team's downstream calendars — Google Calendar, Outlook, Apple Calendar, and any other calendar source connected inside your Cal.com account. You configure those calendar syncs directly in Cal.com, not in PulsyAI.
 For a step-by-step setup guide including how to generate your Cal.com API key, locate your Event ID, and configure multiple booking types, see the full [Cal.com setup guide](/platform/integrations/cal-com).
## GoHighLevel (GHL)
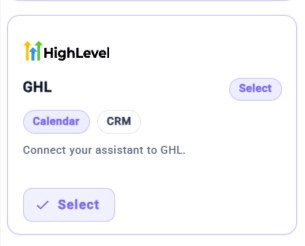
GoHighLevel is a CRM integration that connects your PulsyAI voice agent to your GoHighLevel subaccount — syncing contacts, calendars, opportunities, and conversations.
Setup uses an OAuth flow. Click **Select**, then follow the on-screen authentication steps to authorize your GHL subaccount.
For a step-by-step setup guide including how to generate your Cal.com API key, locate your Event ID, and configure multiple booking types, see the full [Cal.com setup guide](/platform/integrations/cal-com).
## GoHighLevel (GHL)
GoHighLevel is a CRM integration that connects your PulsyAI voice agent to your GoHighLevel subaccount — syncing contacts, calendars, opportunities, and conversations.
Setup uses an OAuth flow. Click **Select**, then follow the on-screen authentication steps to authorize your GHL subaccount.
 For the complete OAuth authorization flow and a breakdown of what data syncs between PulsyAI and your GoHighLevel subaccount, see the full [GoHighLevel setup guide](/platform/integrations/gohighlevel).
## Telegram
Telegram is a messaging integration that connects your PulsyAI chatbot to a Telegram bot, enabling text-based conversations with your customers directly through Telegram chats.
Configuration fields:
* **Bot token** — paste the token from BotFather.
For the complete OAuth authorization flow and a breakdown of what data syncs between PulsyAI and your GoHighLevel subaccount, see the full [GoHighLevel setup guide](/platform/integrations/gohighlevel).
## Telegram
Telegram is a messaging integration that connects your PulsyAI chatbot to a Telegram bot, enabling text-based conversations with your customers directly through Telegram chats.
Configuration fields:
* **Bot token** — paste the token from BotFather.
 ## Meta pages
Meta pages is a messaging integration that connects your PulsyAI chatbot to Facebook Messenger through your Meta account, letting you handle inbound messages from customers who chat with your business pages.
Setup uses OAuth via Meta. Click **Select**, sign in with your Meta account, and authorize the pages you want connected.
## Meta pages
Meta pages is a messaging integration that connects your PulsyAI chatbot to Facebook Messenger through your Meta account, letting you handle inbound messages from customers who chat with your business pages.
Setup uses OAuth via Meta. Click **Select**, sign in with your Meta account, and authorize the pages you want connected.
 ## Zapier
Zapier is an automation integration that pushes structured call data from your PulsyAI voice agent to any Zapier-connected app.
Configuration fields:
* **Name** — a descriptive name.
* **Zap ID** — found at the end of your Zap URL.
* **Fields** — uses the extractable fields pattern documented above.
A **Test Zap** button fires a test payload so you can verify the wiring before going live.
## Zapier
Zapier is an automation integration that pushes structured call data from your PulsyAI voice agent to any Zapier-connected app.
Configuration fields:
* **Name** — a descriptive name.
* **Zap ID** — found at the end of your Zap URL.
* **Fields** — uses the extractable fields pattern documented above.
A **Test Zap** button fires a test payload so you can verify the wiring before going live.
 For step-by-step setup including how to find your Zap ID, design field mappings, and example workflows that connect PulsyAI to common CRMs and tools, see the full [Zapier setup guide](/platform/integrations/zapier).
## Make
Make is an automation integration identical in structure to Zapier — it pushes structured call data from your PulsyAI voice agent to your Make scenarios.
Configuration mirrors Zapier exactly (Name + scenario ID + extractable fields). See the Zapier section above for the field pattern.
For step-by-step setup including how to find your Zap ID, design field mappings, and example workflows that connect PulsyAI to common CRMs and tools, see the full [Zapier setup guide](/platform/integrations/zapier).
## Make
Make is an automation integration identical in structure to Zapier — it pushes structured call data from your PulsyAI voice agent to your Make scenarios.
Configuration mirrors Zapier exactly (Name + scenario ID + extractable fields). See the Zapier section above for the field pattern.
 For step-by-step setup including how to find your scenario ID, design field mappings, and example Make automations, see the full [Make setup guide](/platform/integrations/make).
## Webhook
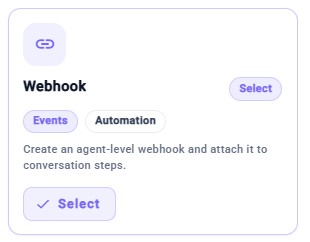
A webhook is an automation integration that posts call lifecycle events from your PulsyAI voice agent to your own HTTPS endpoint.
Configuration fields:
* **Webhook URL** — your endpoint.
* **Event** — dropdown; either `call_start` or `call_end`.
Form entries (extractable fields) are only available when the Event is set to `call_end`. Use `call_start` for lightweight event notifications without structured payloads, and use `call_end` when you need to push the full structured data captured during the call.
For step-by-step setup including how to find your scenario ID, design field mappings, and example Make automations, see the full [Make setup guide](/platform/integrations/make).
## Webhook
A webhook is an automation integration that posts call lifecycle events from your PulsyAI voice agent to your own HTTPS endpoint.
Configuration fields:
* **Webhook URL** — your endpoint.
* **Event** — dropdown; either `call_start` or `call_end`.
Form entries (extractable fields) are only available when the Event is set to `call_end`. Use `call_start` for lightweight event notifications without structured payloads, and use `call_end` when you need to push the full structured data captured during the call.
 For the full reference on call\_start vs call\_end payload structures, schema examples, and recommendations for verifying webhook authenticity, see the full [Webhook setup guide](/platform/integrations/webhook).
## Custom API Call
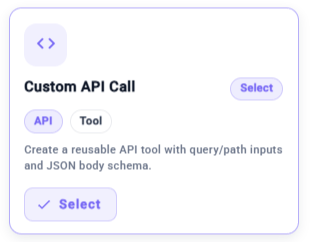
A Custom API Call is a reusable API tool your PulsyAI voice agent can invoke during a call to send or fetch data from any HTTP endpoint.
Configuration fields:
* **Action Name** — letters, numbers, and underscores only; must start with a letter or underscore. This is the name the LLM uses to invoke the tool.
* **HTTP Method** — dropdown, default POST.
* **Endpoint URL** — full `http://` or `https://` URL.
* **Description** — the prompt-side hint that teaches the LLM when to call this tool. Write it clearly and intent-focused.
* **Headers** — key/value pairs (auth tokens, content-type, etc.).
* **Request Schema** — JSON Schema. Use `{}` for no schema, or define `query` (for query string / path params) and/or `body` (for JSON payload) sections.
* **Args only** toggle — pass arguments directly without wrapping them in a body object.
* **Schema Examples** — pre-built starting templates: Customer Lookup, New Customer, Support Ticket Update.
The **Description** field is the most important — a clear, intent-focused description helps the LLM decide when (and when not) to invoke this tool during the conversation. Treat it like writing a function docstring for the AI.
For the full reference on call\_start vs call\_end payload structures, schema examples, and recommendations for verifying webhook authenticity, see the full [Webhook setup guide](/platform/integrations/webhook).
## Custom API Call
A Custom API Call is a reusable API tool your PulsyAI voice agent can invoke during a call to send or fetch data from any HTTP endpoint.
Configuration fields:
* **Action Name** — letters, numbers, and underscores only; must start with a letter or underscore. This is the name the LLM uses to invoke the tool.
* **HTTP Method** — dropdown, default POST.
* **Endpoint URL** — full `http://` or `https://` URL.
* **Description** — the prompt-side hint that teaches the LLM when to call this tool. Write it clearly and intent-focused.
* **Headers** — key/value pairs (auth tokens, content-type, etc.).
* **Request Schema** — JSON Schema. Use `{}` for no schema, or define `query` (for query string / path params) and/or `body` (for JSON payload) sections.
* **Args only** toggle — pass arguments directly without wrapping them in a body object.
* **Schema Examples** — pre-built starting templates: Customer Lookup, New Customer, Support Ticket Update.
The **Description** field is the most important — a clear, intent-focused description helps the LLM decide when (and when not) to invoke this tool during the conversation. Treat it like writing a function docstring for the AI.
 For a complete walkthrough including action naming conventions, JSON Schema patterns, header authentication, and example tool implementations, see the full [Custom API Call setup guide](/platform/integrations/custom-api-call).
## Send DTMF digits
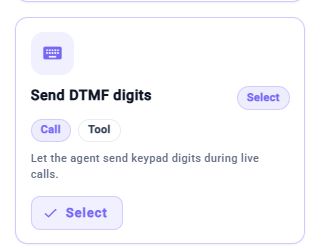
Send DTMF digits is an in-call tool that lets your PulsyAI voice agent send keypad digits during an active phone call — useful for navigating IVR menus, entering extensions, or submitting keypad codes during outbound calls.
Configuration fields:
* **Name** and **Description** — both pre-filled with sensible defaults.
The agent decides which digits to send based on the live conversation context.
For a complete walkthrough including action naming conventions, JSON Schema patterns, header authentication, and example tool implementations, see the full [Custom API Call setup guide](/platform/integrations/custom-api-call).
## Send DTMF digits
Send DTMF digits is an in-call tool that lets your PulsyAI voice agent send keypad digits during an active phone call — useful for navigating IVR menus, entering extensions, or submitting keypad codes during outbound calls.
Configuration fields:
* **Name** and **Description** — both pre-filled with sensible defaults.
The agent decides which digits to send based on the live conversation context.
 ## Collect keypad input
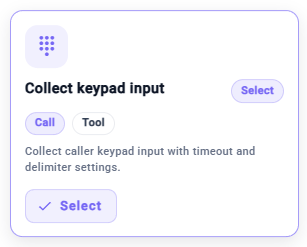
Collect keypad input is an in-call tool that captures DTMF digits pressed by the caller, then processes them once a timeout or delimiter is reached.
Configuration fields:
* **Timeout** — seconds to wait before processing gathered input (default 10).
* **Delimiters** — comma-separated single characters that signal input is complete (default `#,*`; leave blank for no delimiter).
## Collect keypad input
Collect keypad input is an in-call tool that captures DTMF digits pressed by the caller, then processes them once a timeout or delimiter is reached.
Configuration fields:
* **Timeout** — seconds to wait before processing gathered input (default 10).
* **Delimiters** — comma-separated single characters that signal input is complete (default `#,*`; leave blank for no delimiter).
 ## Notifications
Notifications is an alerting integration that sends call summaries or extracted call data to a team member by SMS or email after the call ends.
Configuration fields:
* **Type** — Text message or Email.
* **Targets** — one or more phone numbers or email addresses (add as many as you need).
* **Fields** — extractable fields pattern (see the section above).
## Notifications
Notifications is an alerting integration that sends call summaries or extracted call data to a team member by SMS or email after the call ends.
Configuration fields:
* **Type** — Text message or Email.
* **Targets** — one or more phone numbers or email addresses (add as many as you need).
* **Fields** — extractable fields pattern (see the section above).
 For the complete setup including how to design your alert payload, choose between SMS and email targets, and use extractable fields for context-rich alerts, see the full [Notifications setup guide](/platform/integrations/notifications).
## Call Back
Call Back is an automation integration that re-engages callers who disconnected early — either through an automated SMS or an automated phone callback by your PulsyAI voice agent.
Configuration fields:
* **Condition** — defines when the callback fires (for example: "caller hung up before the booking was confirmed").
* **Action** — choose between **SMS Agent** (re-engage by text) or **Phone agent** (the AI calls the missed caller back).
Although the Condition field is labeled "(Optional)" in the interface, you must enter a condition for Call Back to trigger. Write it specifically so the integration fires only on relevant early disconnections.
For the complete setup including how to design your alert payload, choose between SMS and email targets, and use extractable fields for context-rich alerts, see the full [Notifications setup guide](/platform/integrations/notifications).
## Call Back
Call Back is an automation integration that re-engages callers who disconnected early — either through an automated SMS or an automated phone callback by your PulsyAI voice agent.
Configuration fields:
* **Condition** — defines when the callback fires (for example: "caller hung up before the booking was confirmed").
* **Action** — choose between **SMS Agent** (re-engage by text) or **Phone agent** (the AI calls the missed caller back).
Although the Condition field is labeled "(Optional)" in the interface, you must enter a condition for Call Back to trigger. Write it specifically so the integration fires only on relevant early disconnections.
 For step-by-step setup including how to write effective trigger conditions and choose between SMS Agent and Phone agent callbacks, see the full [Call Back setup guide](/platform/integrations/call-back).
## Stale Conversations
Stale Conversations is an automation integration that handles silent conversations with two independent timers — one that pushes lead data to your connected integrations, and one that triggers your PulsyAI voice agent to automatically re-engage the caller by SMS.
Configuration fields:
* **How long until stale conversations are pushed to your integrations** — the delay after which lead data is automatically forwarded to your connected CRM, automation platform, or webhook (minutes / hours / days).
* **How long until stale conversations are relaunched by the assistant** — the delay after which the assistant sends a re-engagement SMS.
* **Max relaunch attempts** — caps how many re-engagement messages the assistant sends before giving up.
This dual-timer design means **no lead is ever lost**. Even if a contact ghosts mid-conversation, their information is automatically pushed to your CRM after the configured delay, while the assistant independently tries to re-engage them through SMS follow-ups — with a configurable retry cap so you don't over-message.
Stale Conversations is **always-on** once configured. It does not need to be connected to a Call Flow step.
For step-by-step setup including how to write effective trigger conditions and choose between SMS Agent and Phone agent callbacks, see the full [Call Back setup guide](/platform/integrations/call-back).
## Stale Conversations
Stale Conversations is an automation integration that handles silent conversations with two independent timers — one that pushes lead data to your connected integrations, and one that triggers your PulsyAI voice agent to automatically re-engage the caller by SMS.
Configuration fields:
* **How long until stale conversations are pushed to your integrations** — the delay after which lead data is automatically forwarded to your connected CRM, automation platform, or webhook (minutes / hours / days).
* **How long until stale conversations are relaunched by the assistant** — the delay after which the assistant sends a re-engagement SMS.
* **Max relaunch attempts** — caps how many re-engagement messages the assistant sends before giving up.
This dual-timer design means **no lead is ever lost**. Even if a contact ghosts mid-conversation, their information is automatically pushed to your CRM after the configured delay, while the assistant independently tries to re-engage them through SMS follow-ups — with a configurable retry cap so you don't over-message.
Stale Conversations is **always-on** once configured. It does not need to be connected to a Call Flow step.
 For step-by-step setup including how to choose the right timing strategy, design effective re-engagement SMS templates, and configure your retry cap, see the full [Stale Conversations setup guide](/platform/integrations/stale-conversations).
## Always-on vs step-attached integrations
Some PulsyAI integrations run automatically once configured (always-on), while others must be attached to a specific Call Flow step using **+ Connect Action**.
### Always-on integrations
Configure them in the Integrations tab and they fire on their own based on the conditions you set:
* Stale Conversations
* Call Back
### Step-attached integrations
Configure them first in the Integrations tab, then attach them to a specific step in the Call Flow editor via **+ Connect Action**:
* Cal.com
* GoHighLevel
* Zapier
* Make
* Webhook (when configured for `call_end` with form entries)
* Custom API Call
* Send DTMF digits
* Collect keypad input
* Notifications
* Telegram
* Meta pages
Practical rule of thumb — after saving any integration, open your Call Flow and click **+ Connect Action** on a step. If your integration appears in the list, attach it where it should fire. If it doesn't appear, the integration is already running automatically and no further action is needed.
For step-by-step setup including how to choose the right timing strategy, design effective re-engagement SMS templates, and configure your retry cap, see the full [Stale Conversations setup guide](/platform/integrations/stale-conversations).
## Always-on vs step-attached integrations
Some PulsyAI integrations run automatically once configured (always-on), while others must be attached to a specific Call Flow step using **+ Connect Action**.
### Always-on integrations
Configure them in the Integrations tab and they fire on their own based on the conditions you set:
* Stale Conversations
* Call Back
### Step-attached integrations
Configure them first in the Integrations tab, then attach them to a specific step in the Call Flow editor via **+ Connect Action**:
* Cal.com
* GoHighLevel
* Zapier
* Make
* Webhook (when configured for `call_end` with form entries)
* Custom API Call
* Send DTMF digits
* Collect keypad input
* Notifications
* Telegram
* Meta pages
Practical rule of thumb — after saving any integration, open your Call Flow and click **+ Connect Action** on a step. If your integration appears in the list, attach it where it should fire. If it doesn't appear, the integration is already running automatically and no further action is needed.